01
Install and open the app
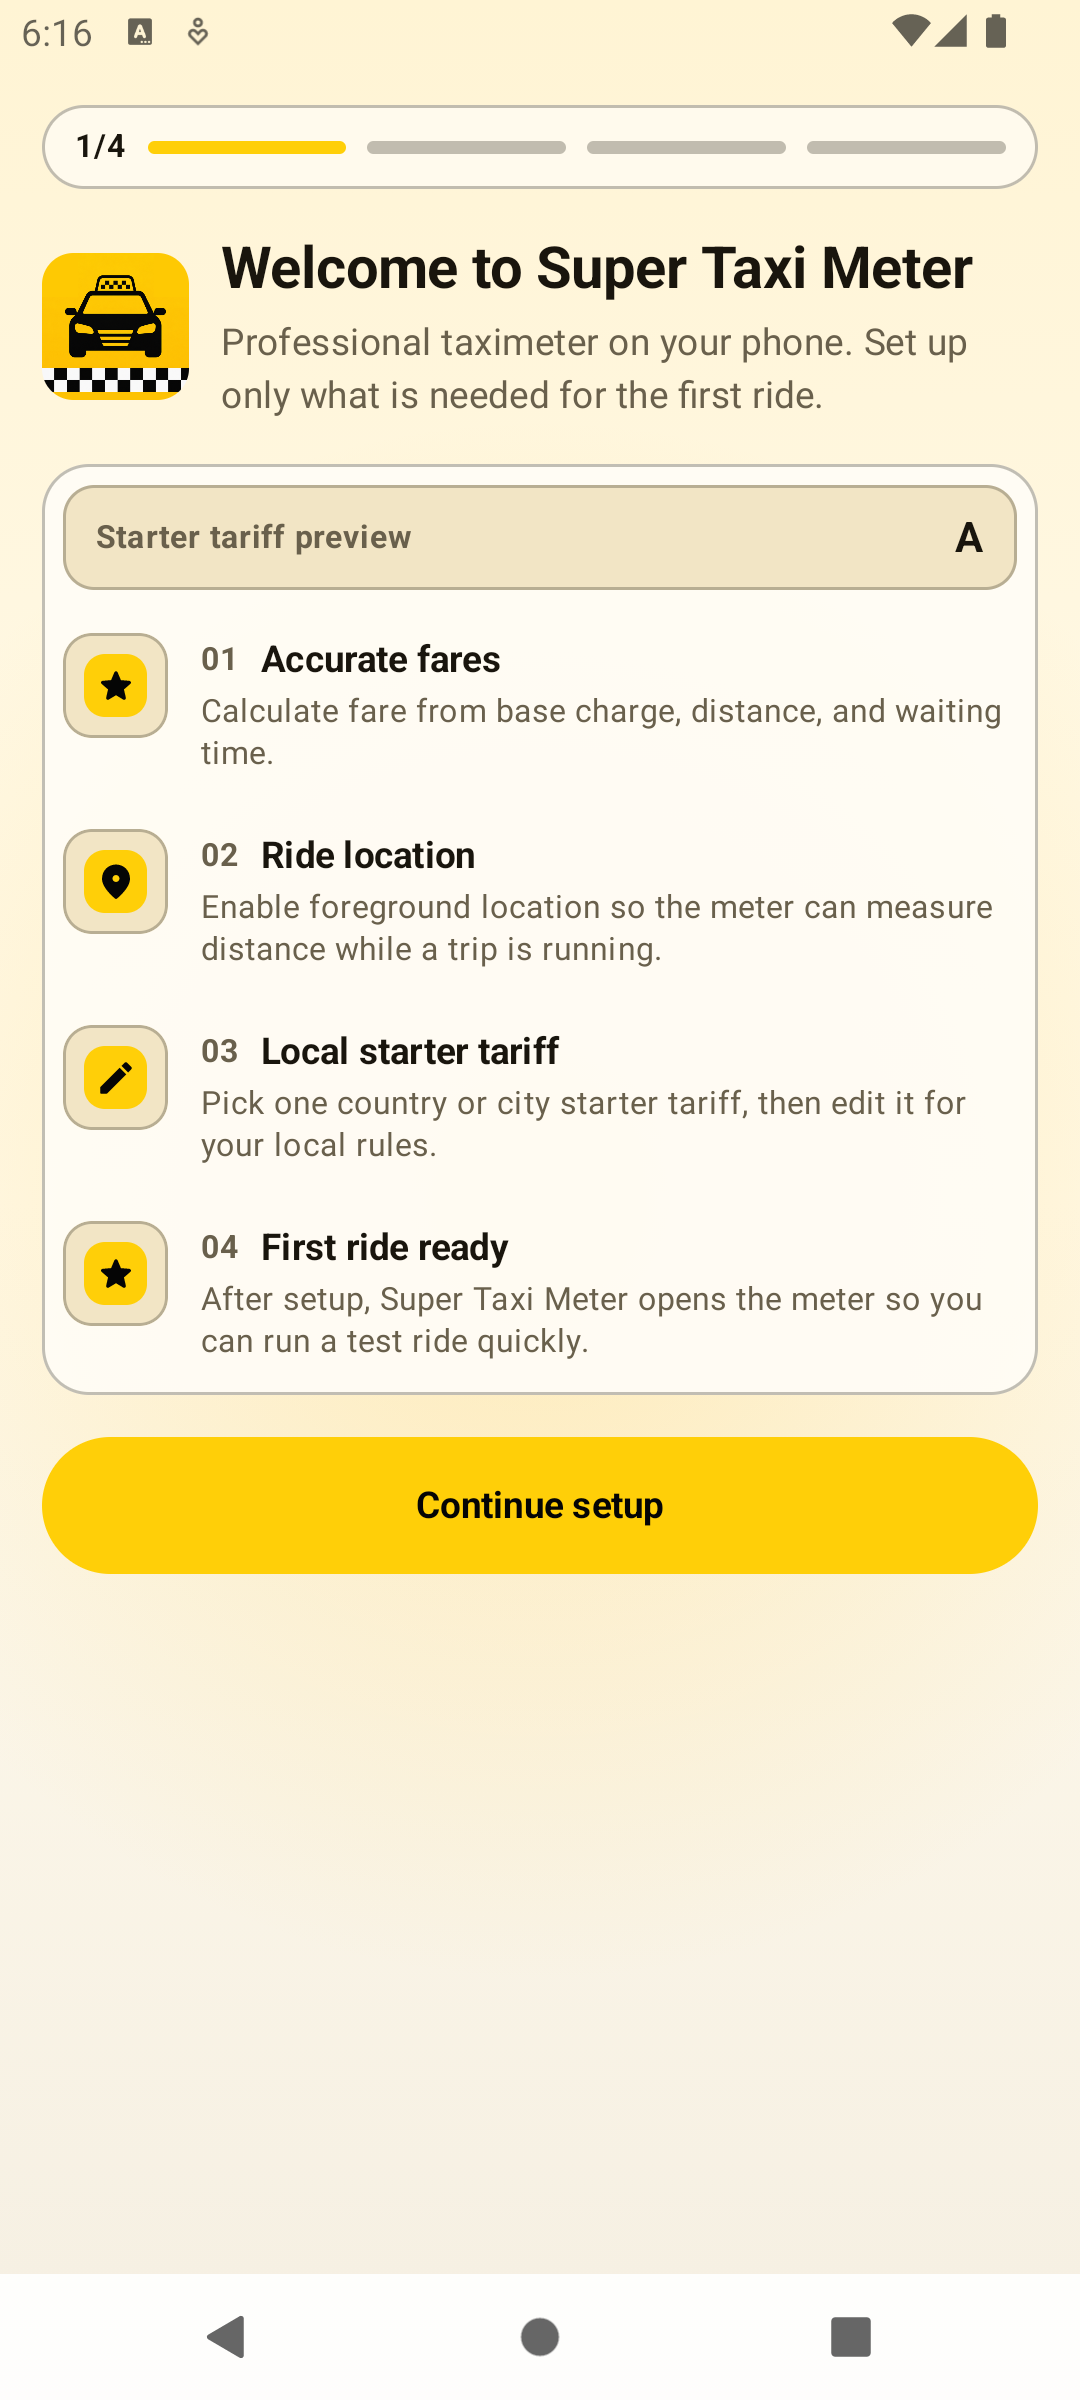
Open Super Taxi Meter on Android. The first screens explain the setup order before the app asks for Android permissions.
User Guide
Set up the Android taximeter, create a local tariff, run a ride, save the trip, and manage every current settings area.
Onboarding
Open Super Taxi Meter on Android. The first screens explain the setup order before the app asks for Android permissions.
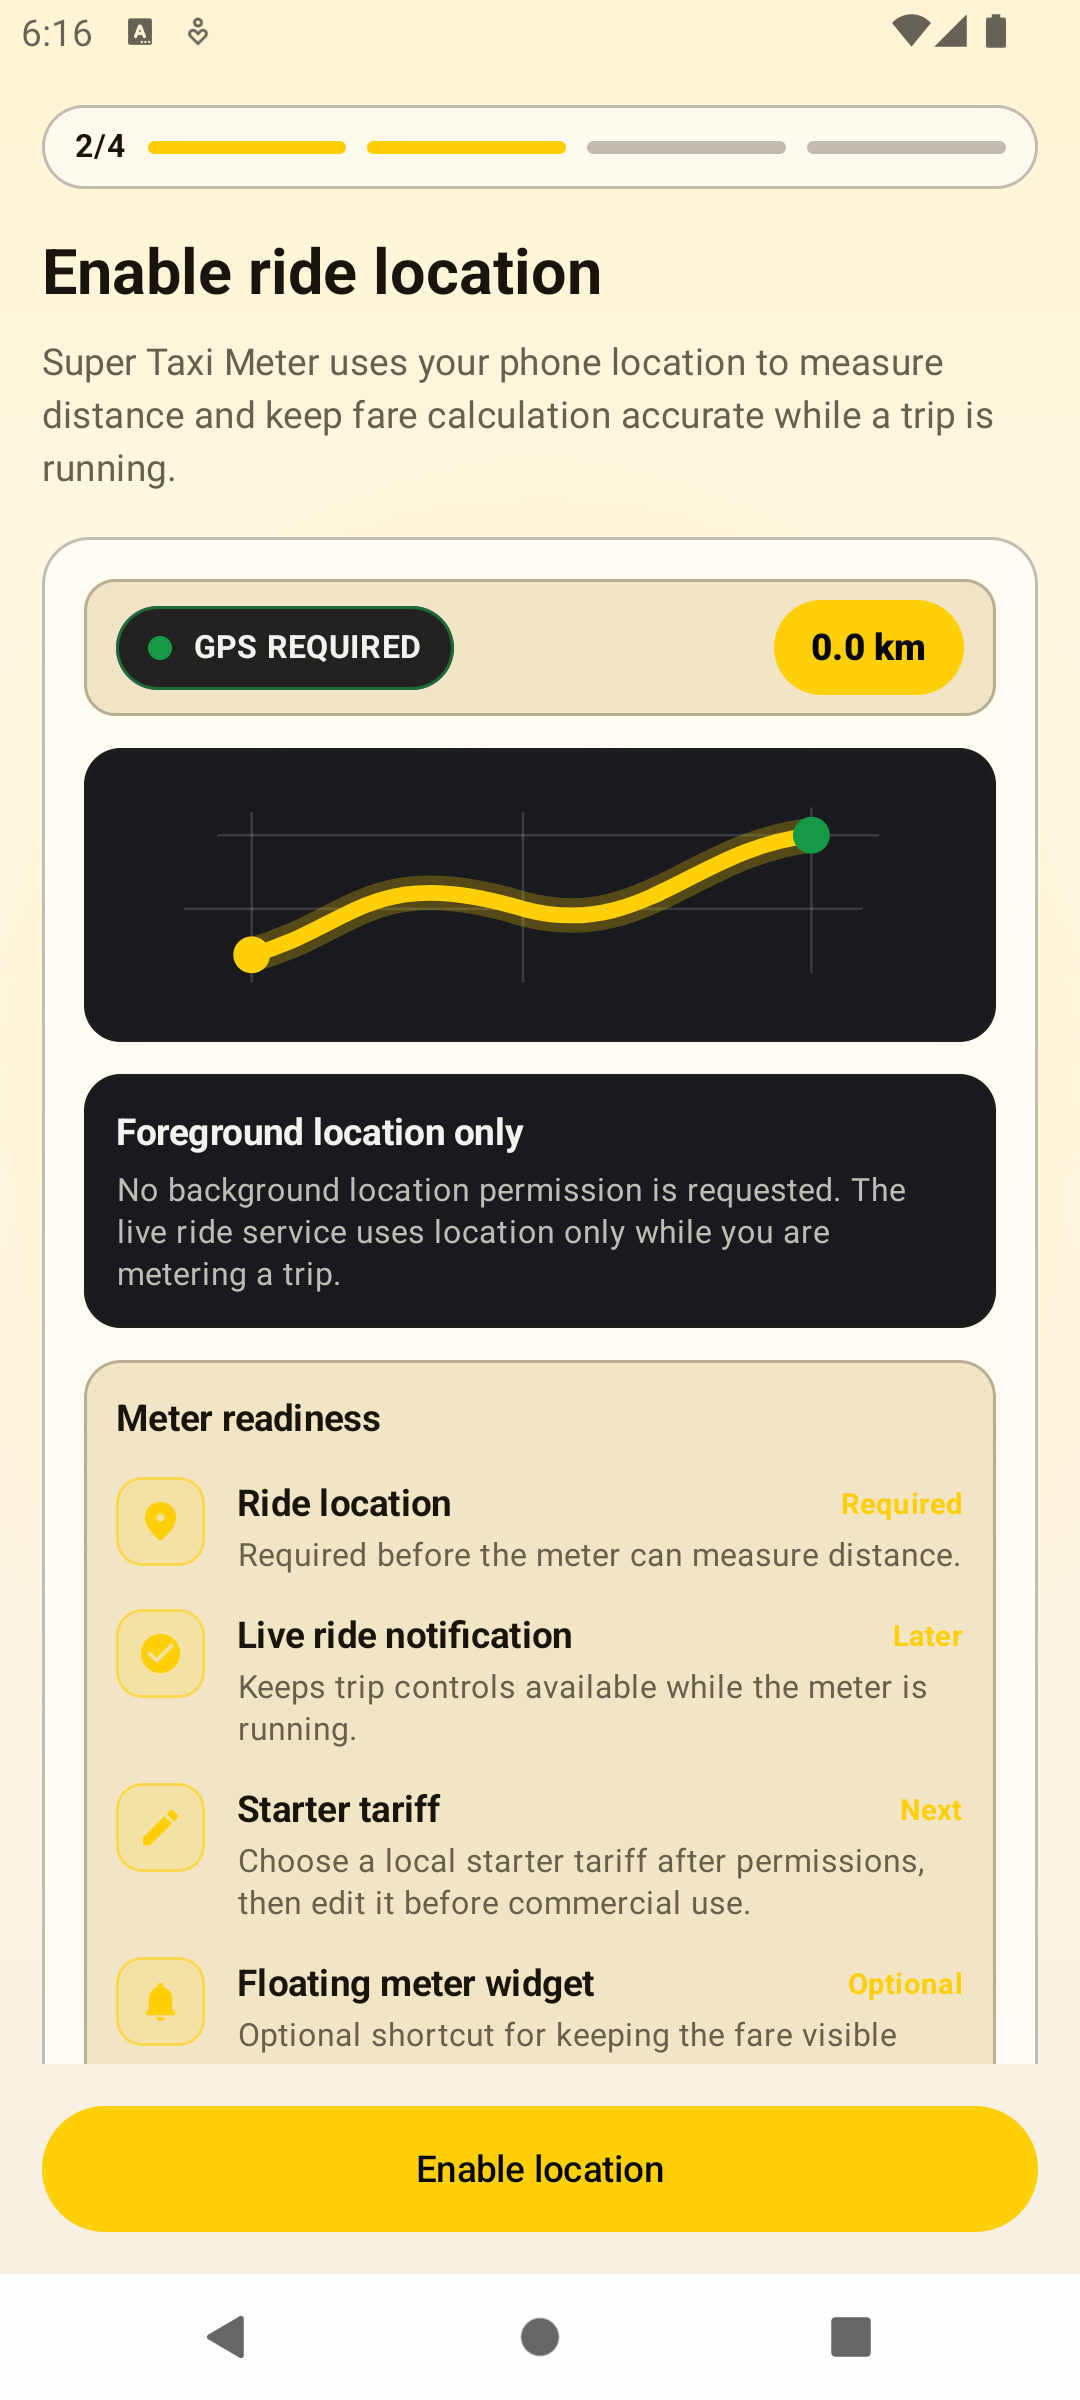
Allow precise foreground location when Android asks. The meter uses location while a trip is running to measure distance and support fare calculation.
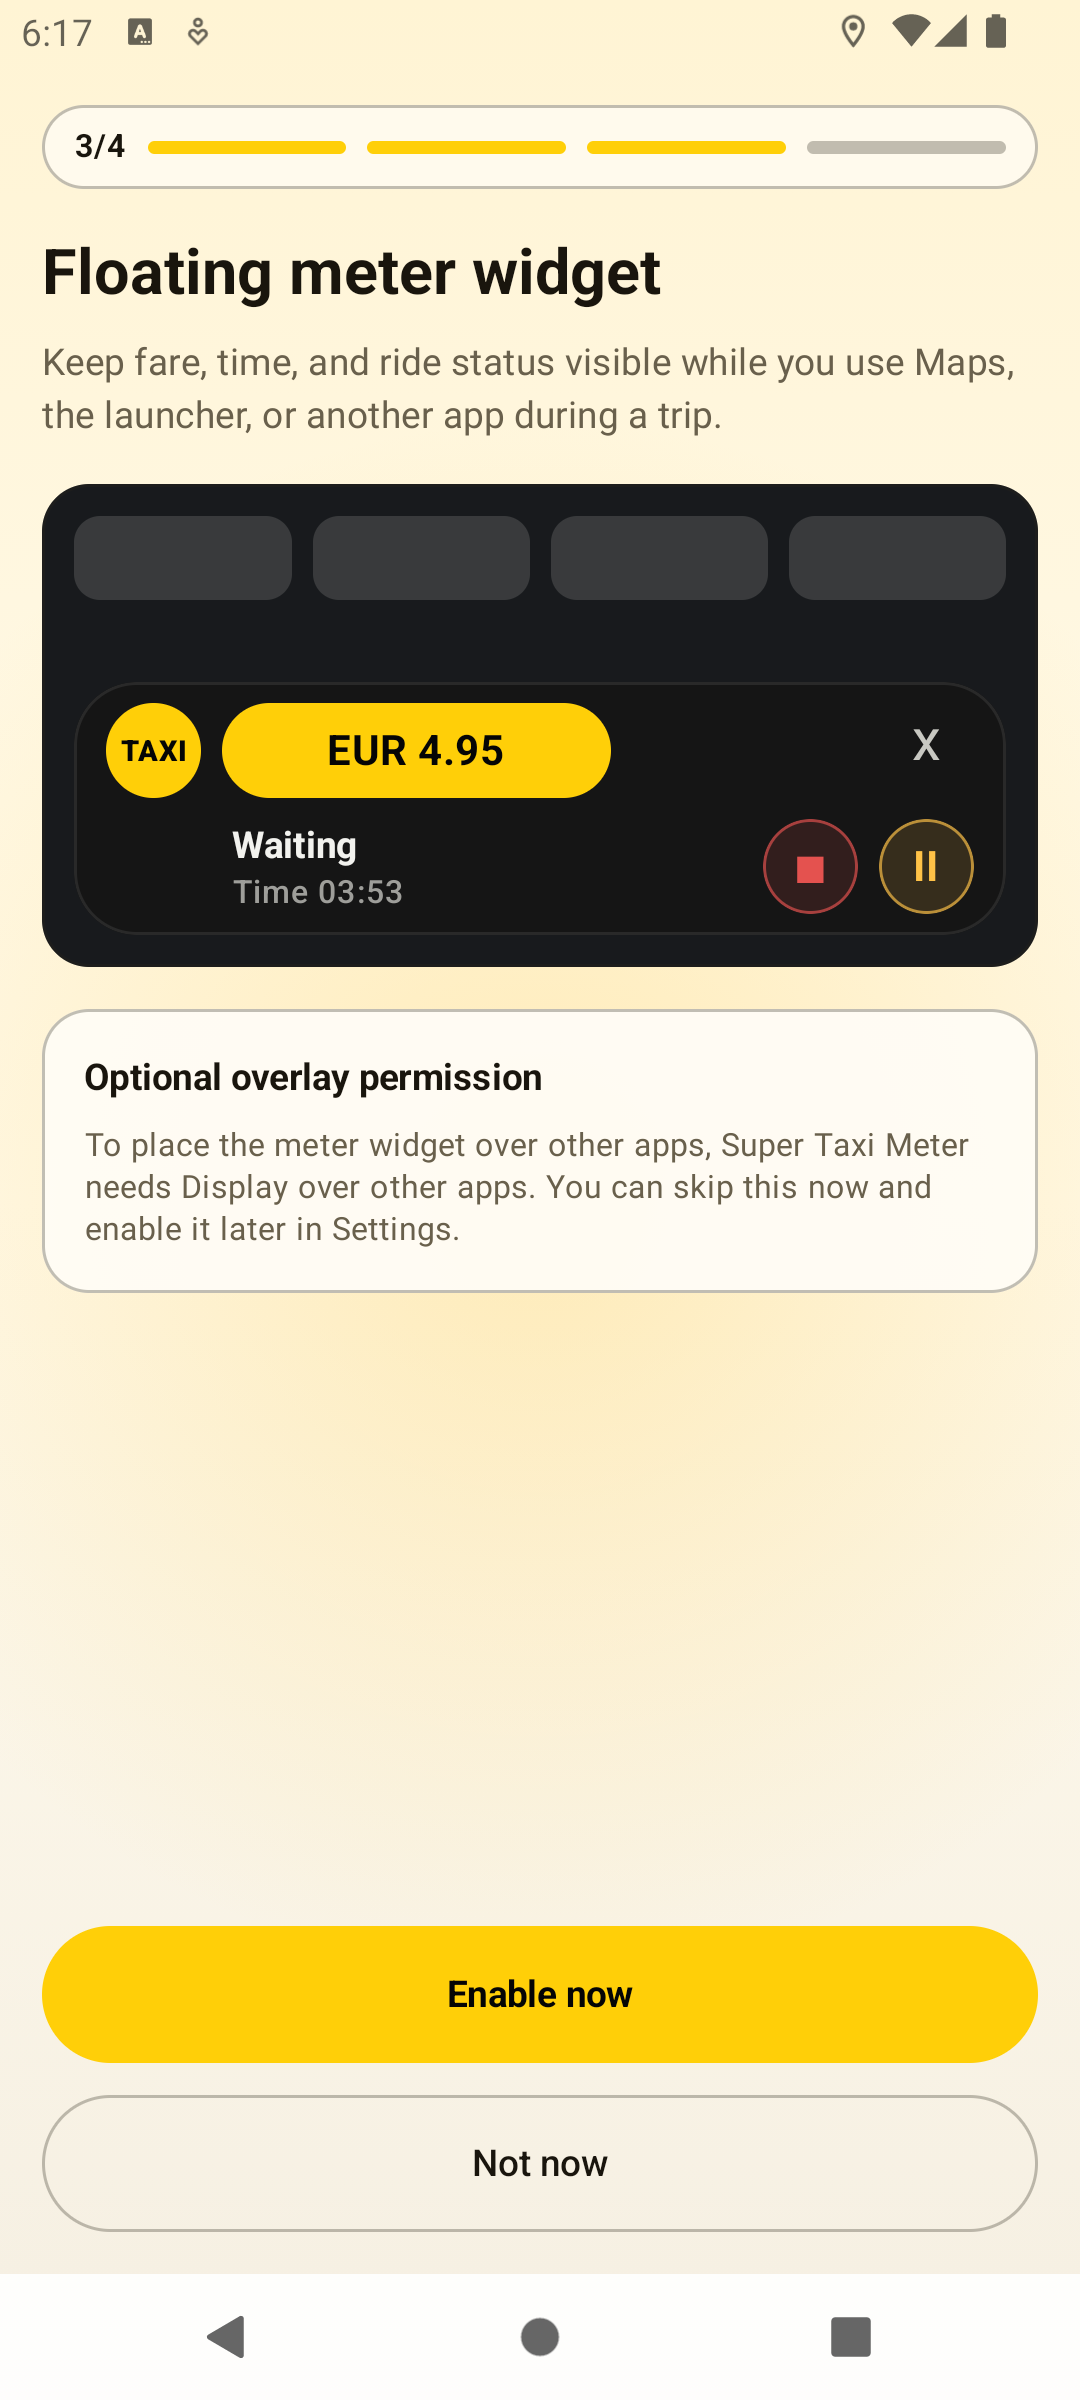
The floating meter widget can keep fare, time, and ride status visible over other apps. It is optional and can be enabled later in Settings.
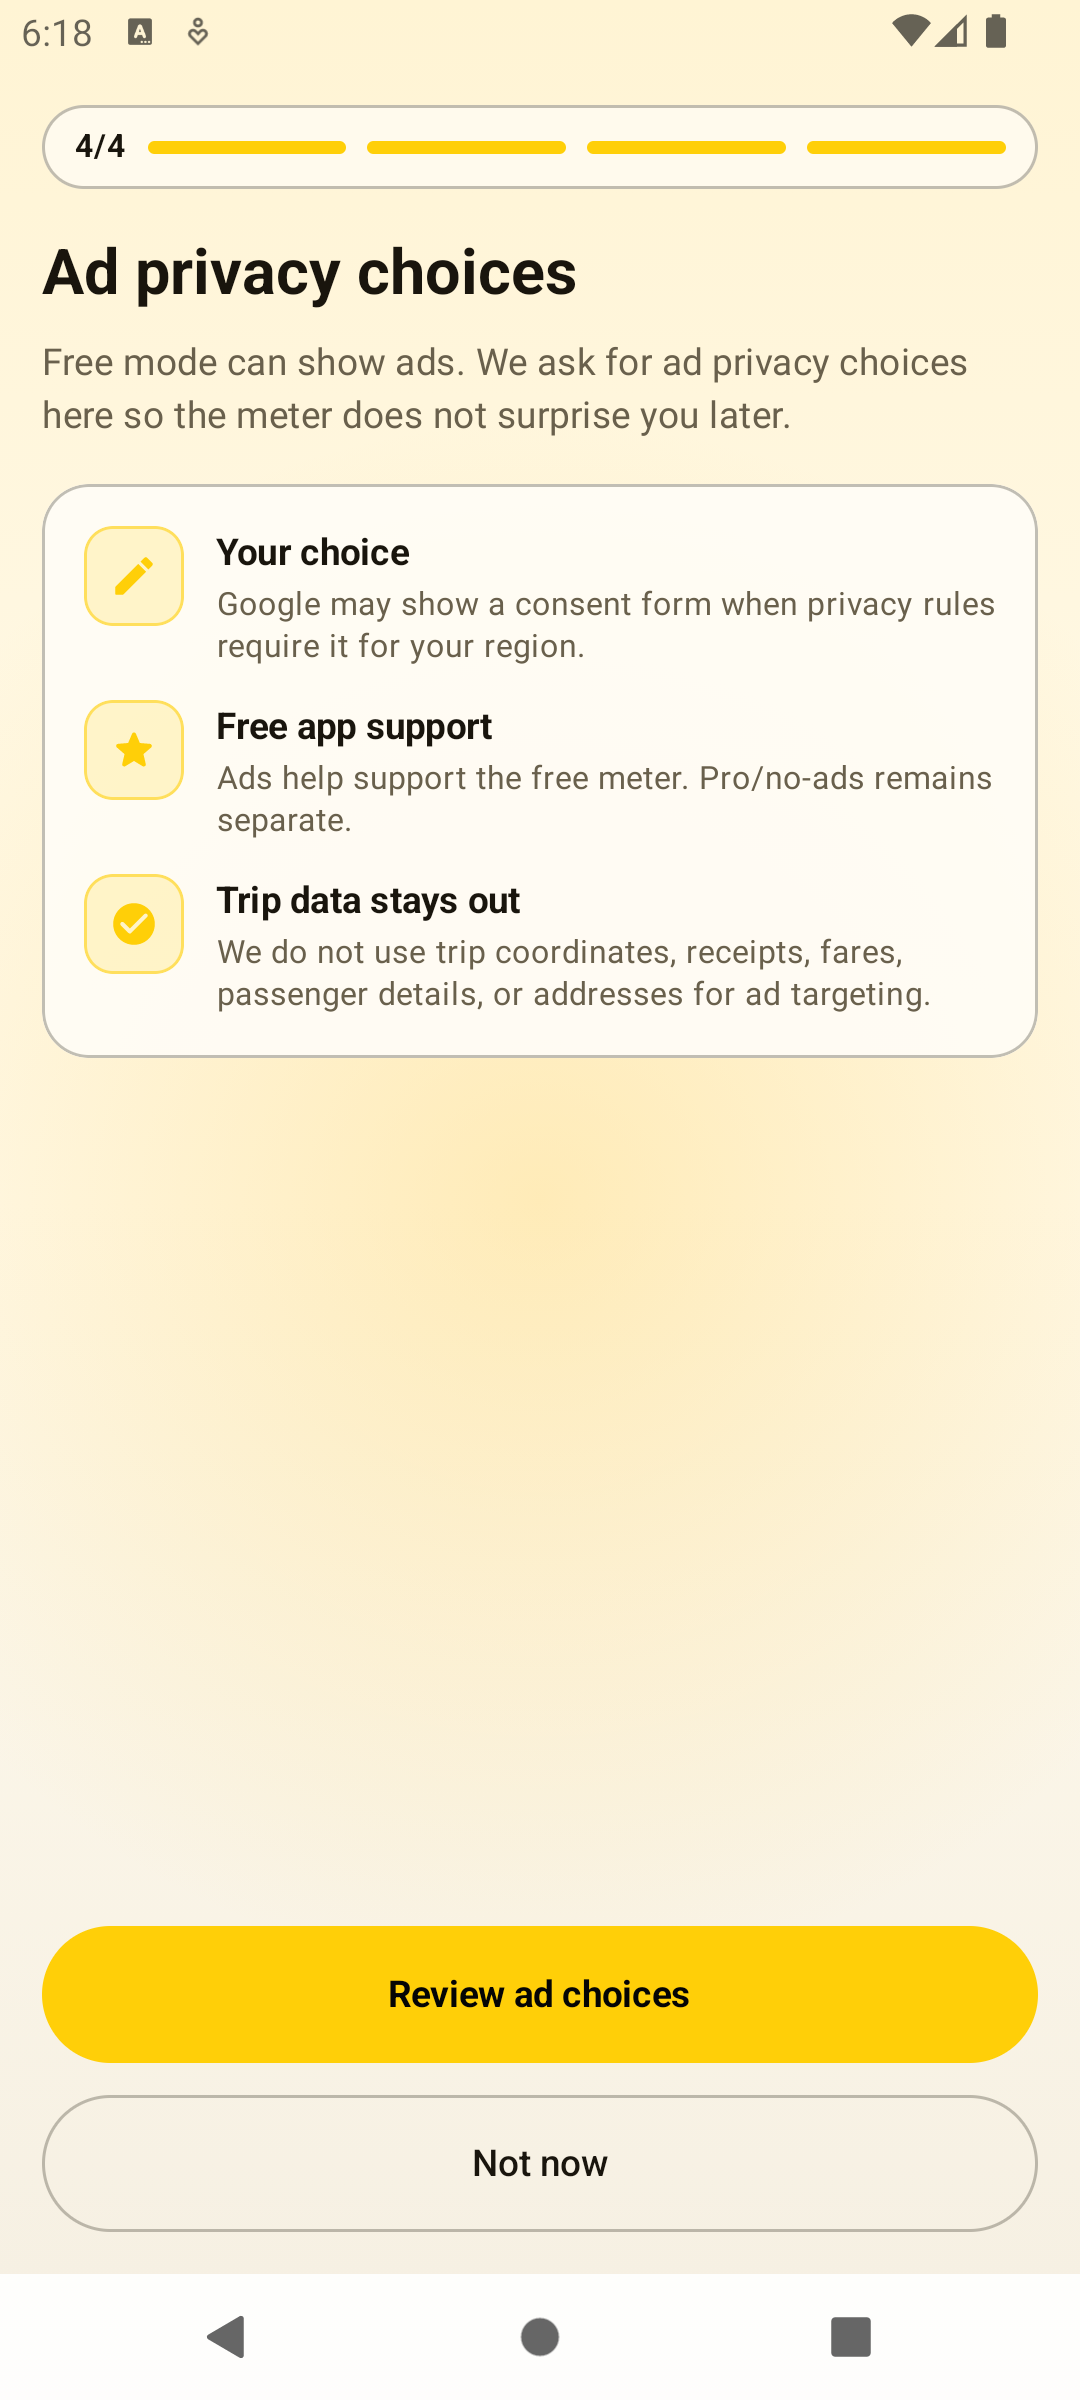
Free mode can show ads. The app asks about ad privacy during onboarding so the meter does not surprise you later.
Meter Workflow
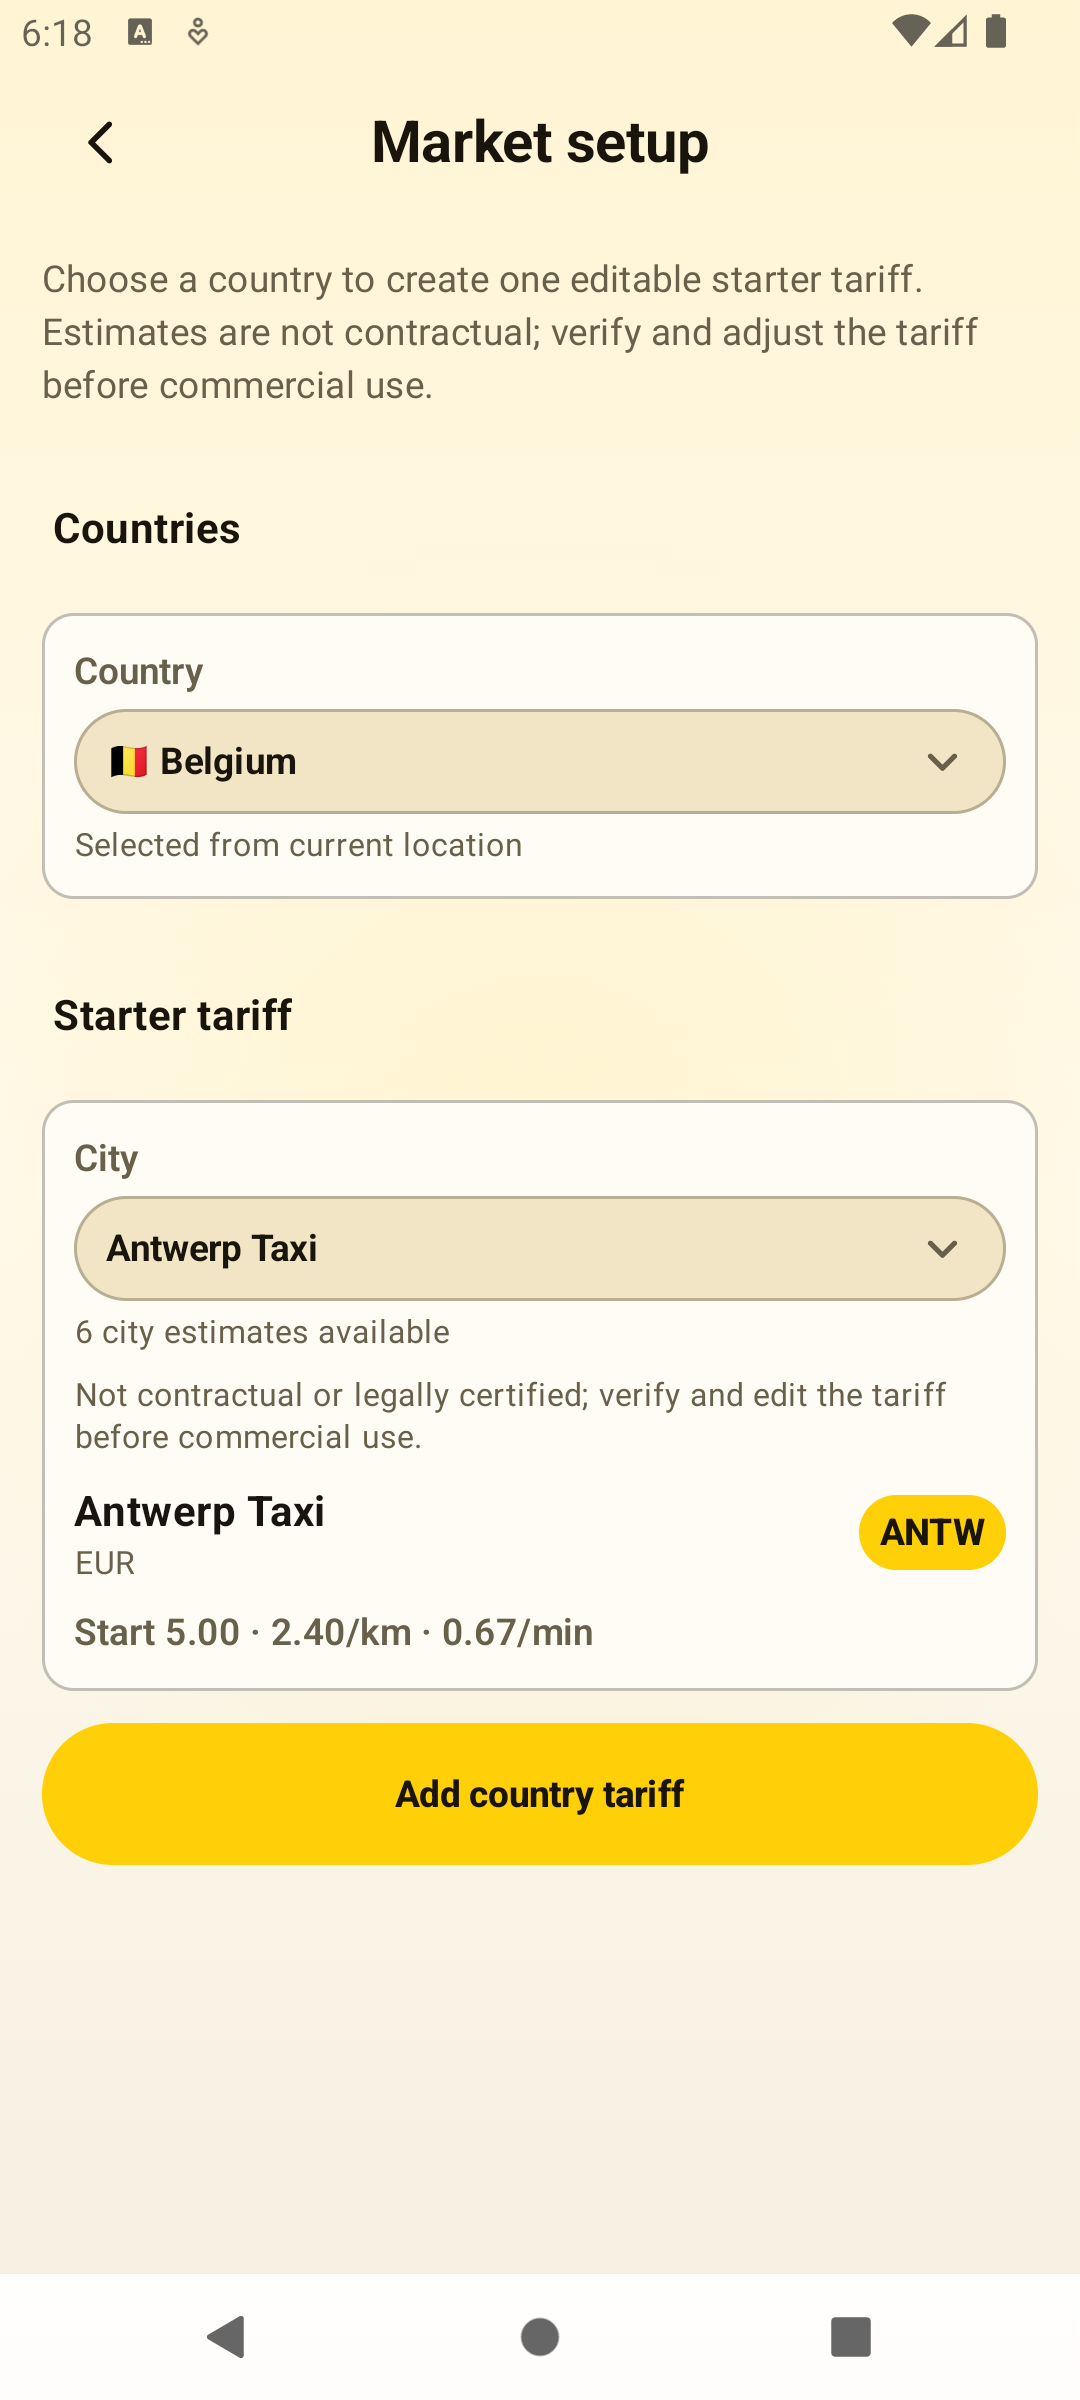
Starter tariff
Market setup helps you create a starter tariff from a country or city estimate. Treat it as a starting point, then verify and edit the rates for your local rules before commercial use.
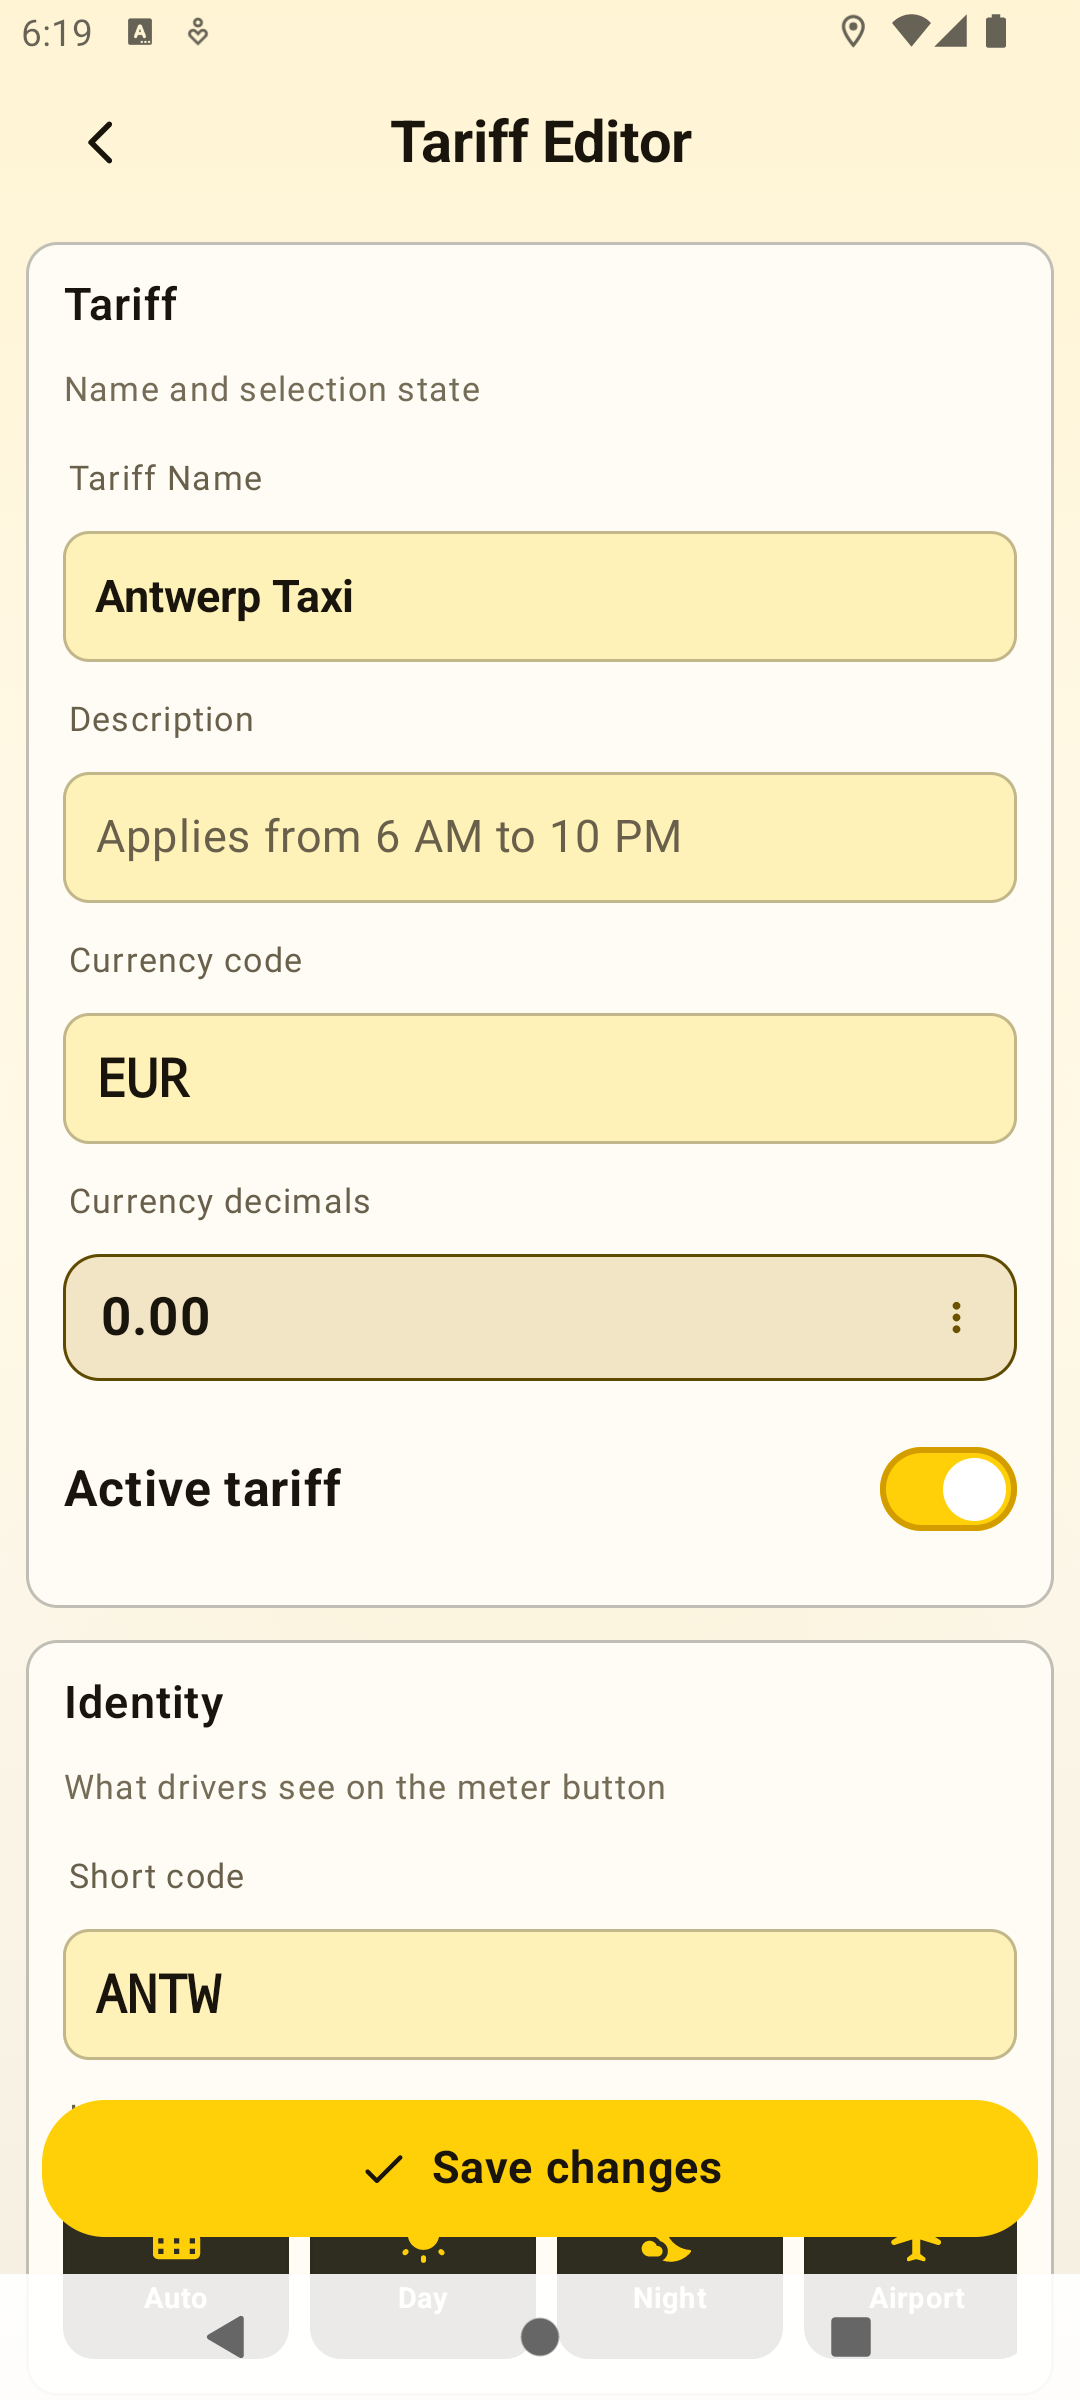
Tariff editor
The generated tariff opens in the tariff editor. Check the name, currency, base fare, distance rate, waiting rate, short code, icon, and active state before saving.
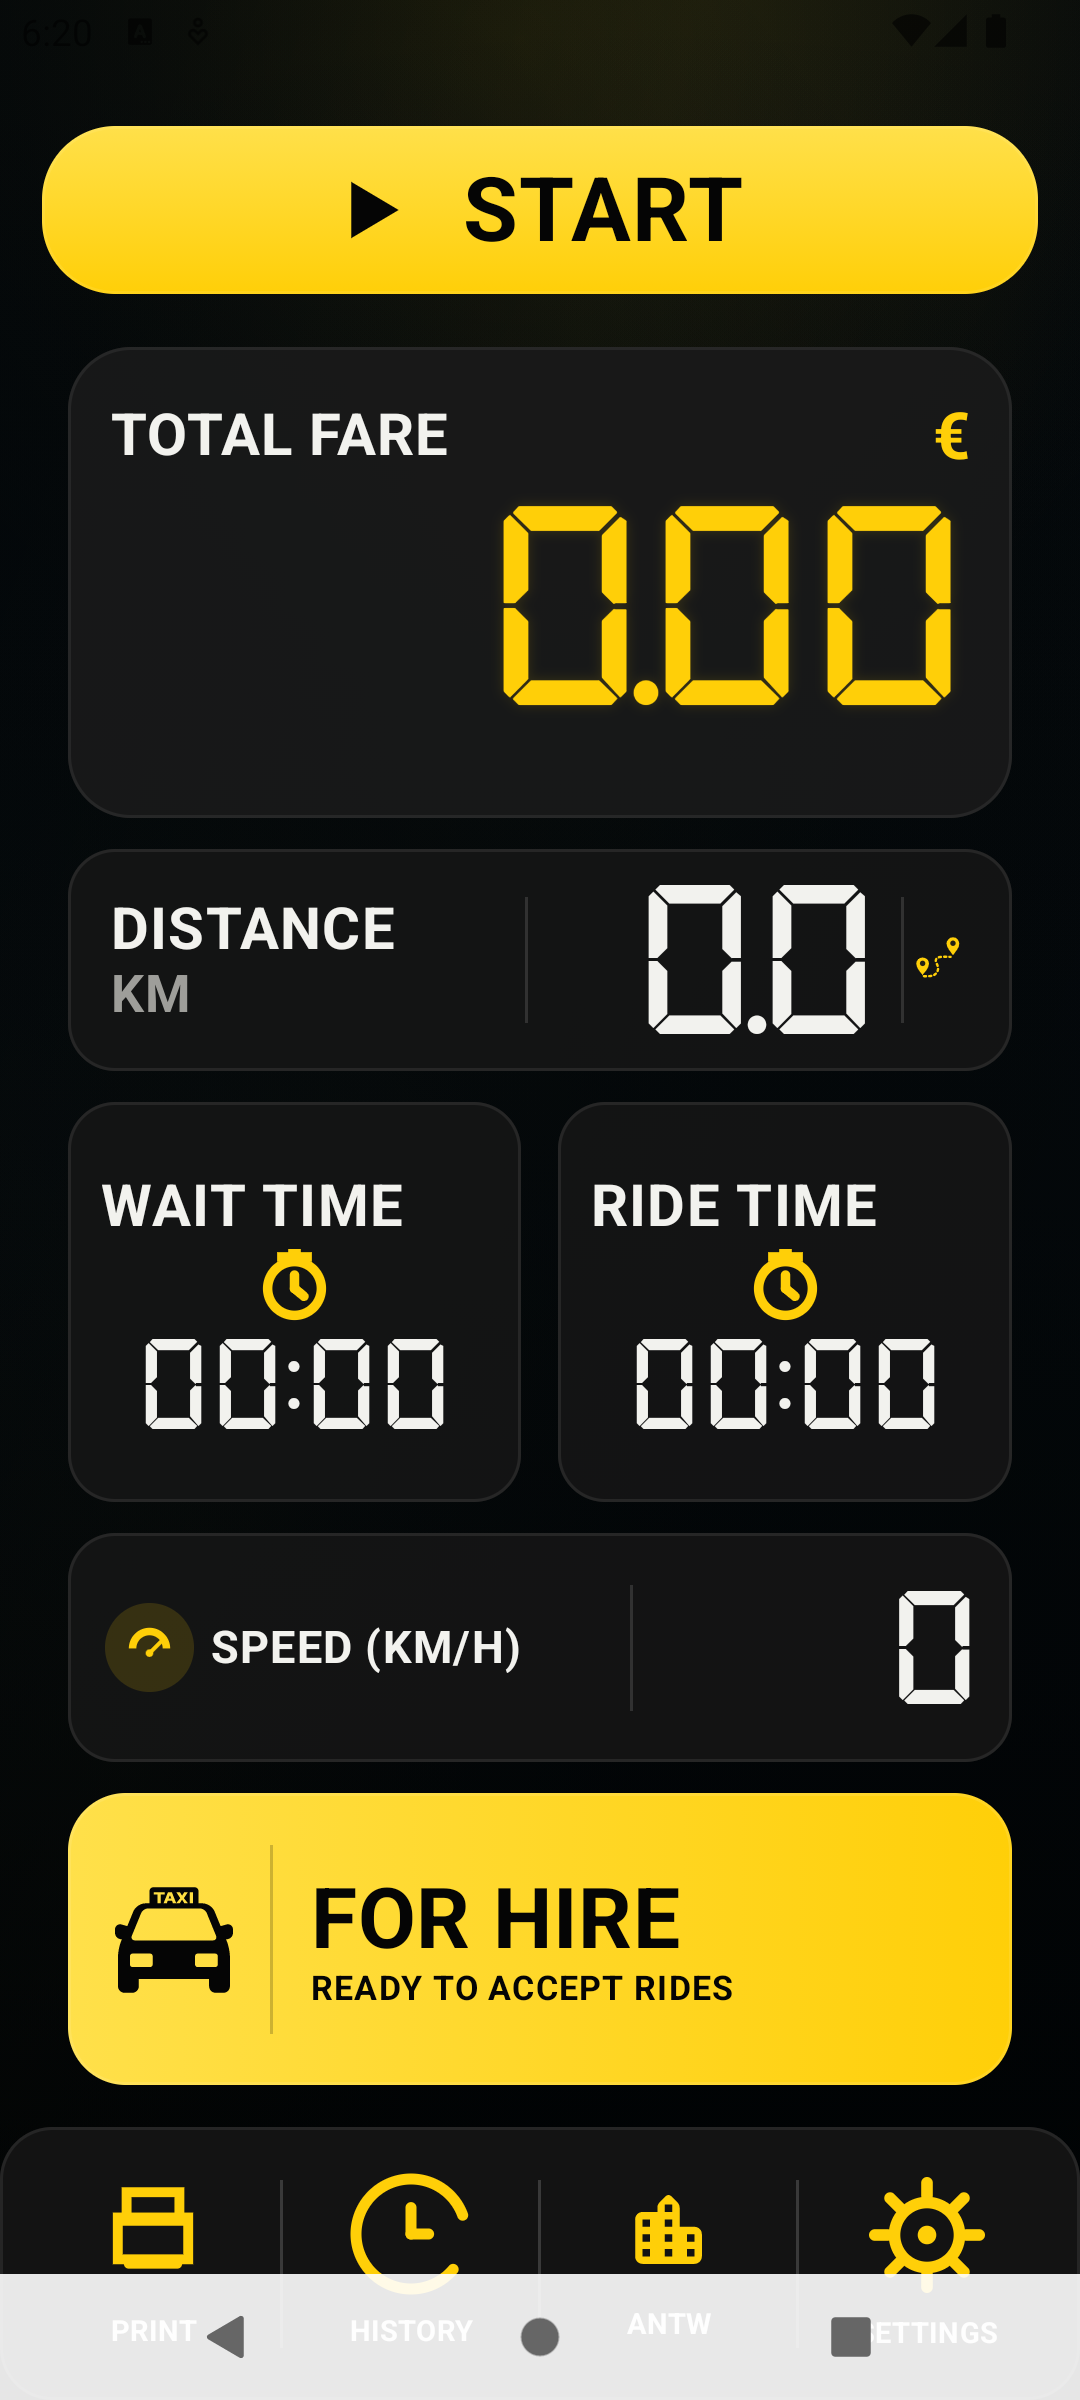
Meter ready
When a tariff is active, the meter shows Start, total fare, distance, wait time, ride time, speed, status, and quick navigation for Print, History, Tariffs, and Settings.

During a trip
Running trips show live fare, ride time, wait time, distance, speed, and ride status. Pause when the fare should not keep running, then Resume when the trip continues.
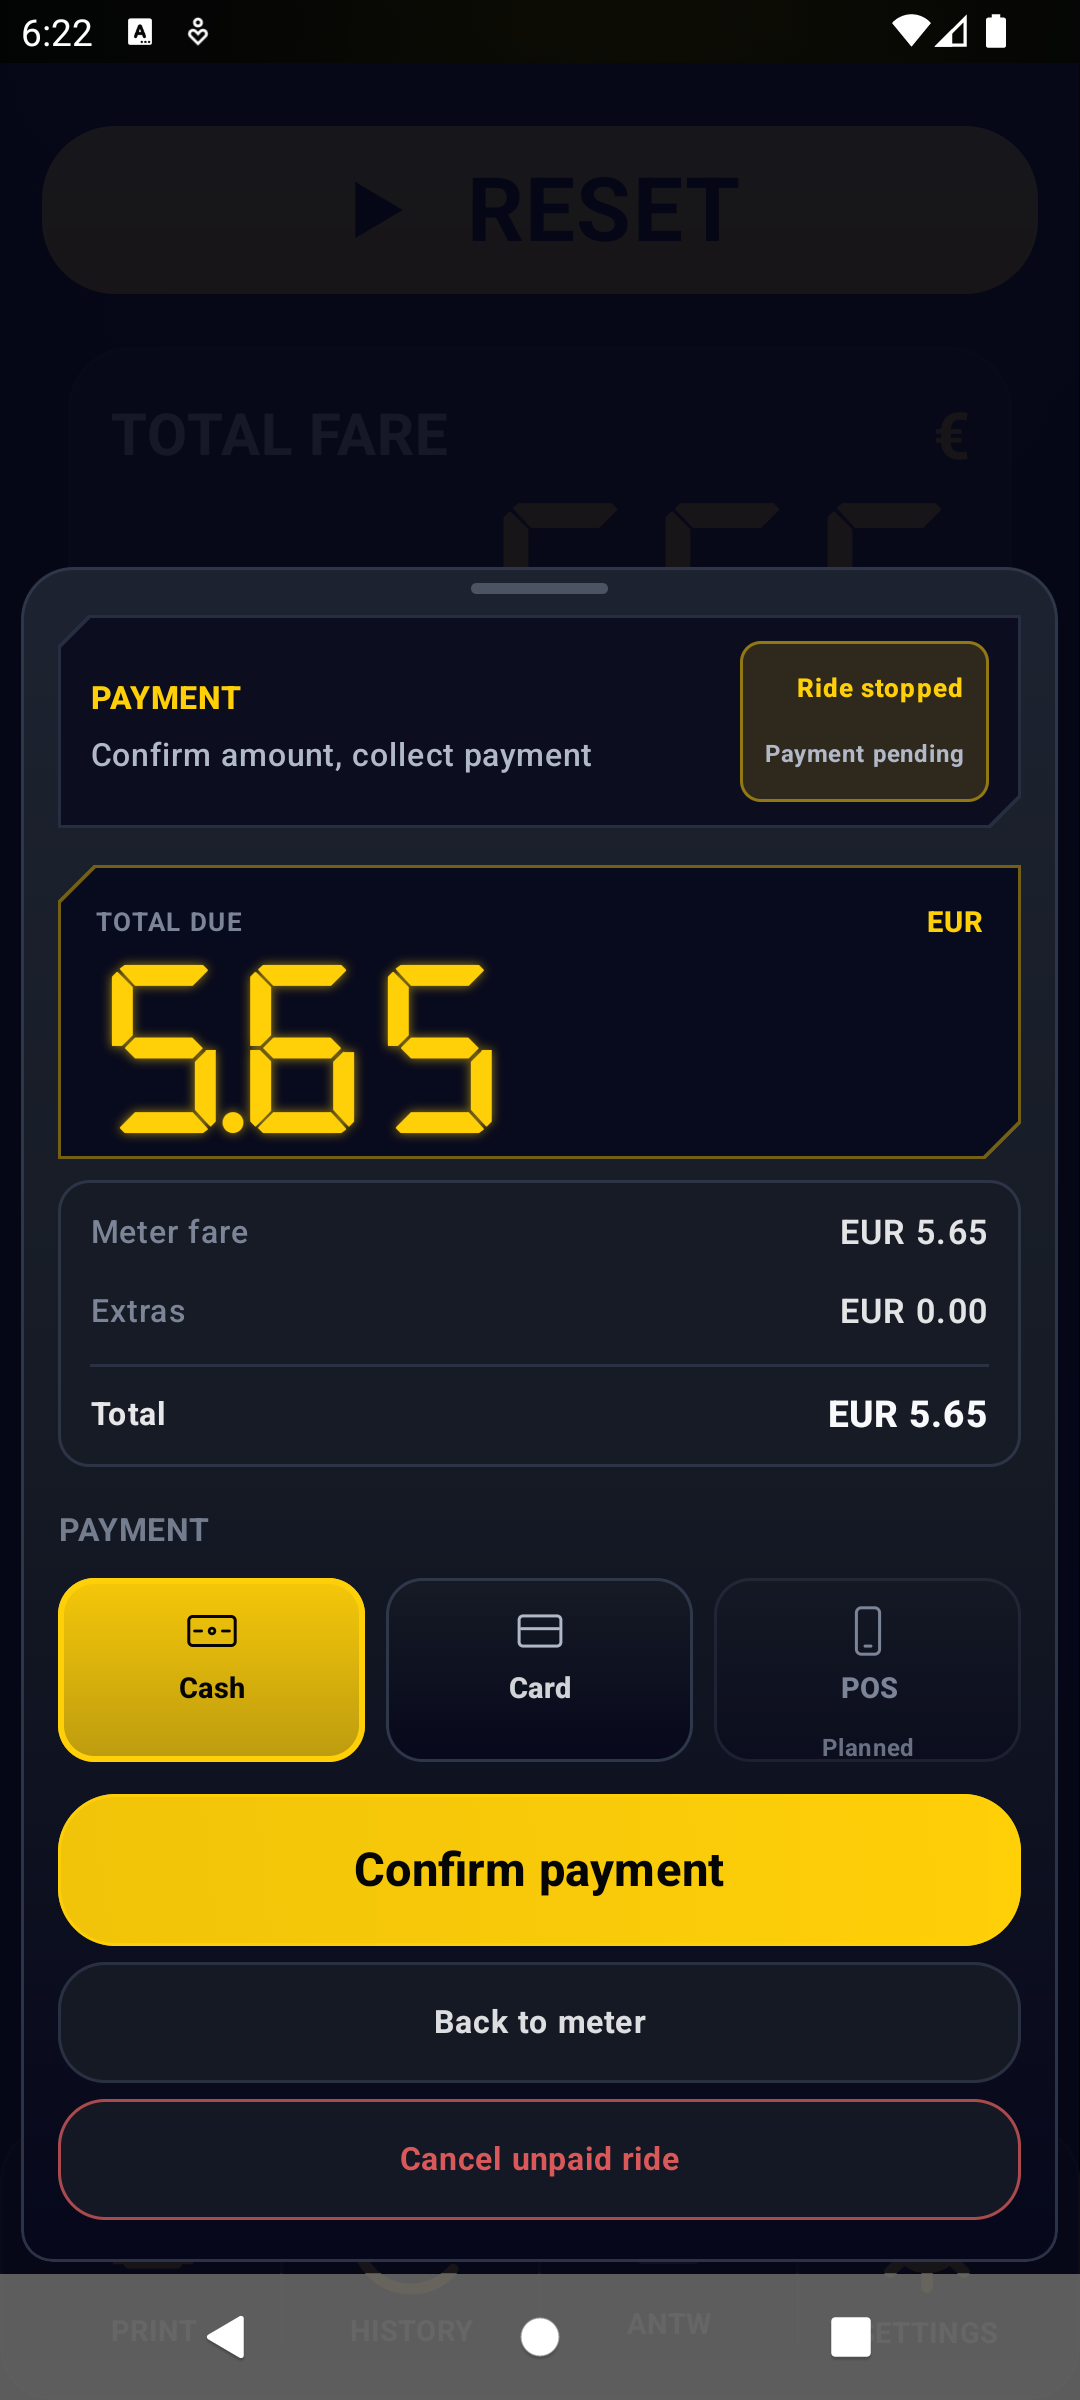
Payment
After stopping, confirm the amount and payment method. Cash and card are active options; POS is shown as planned until a real integration ships.
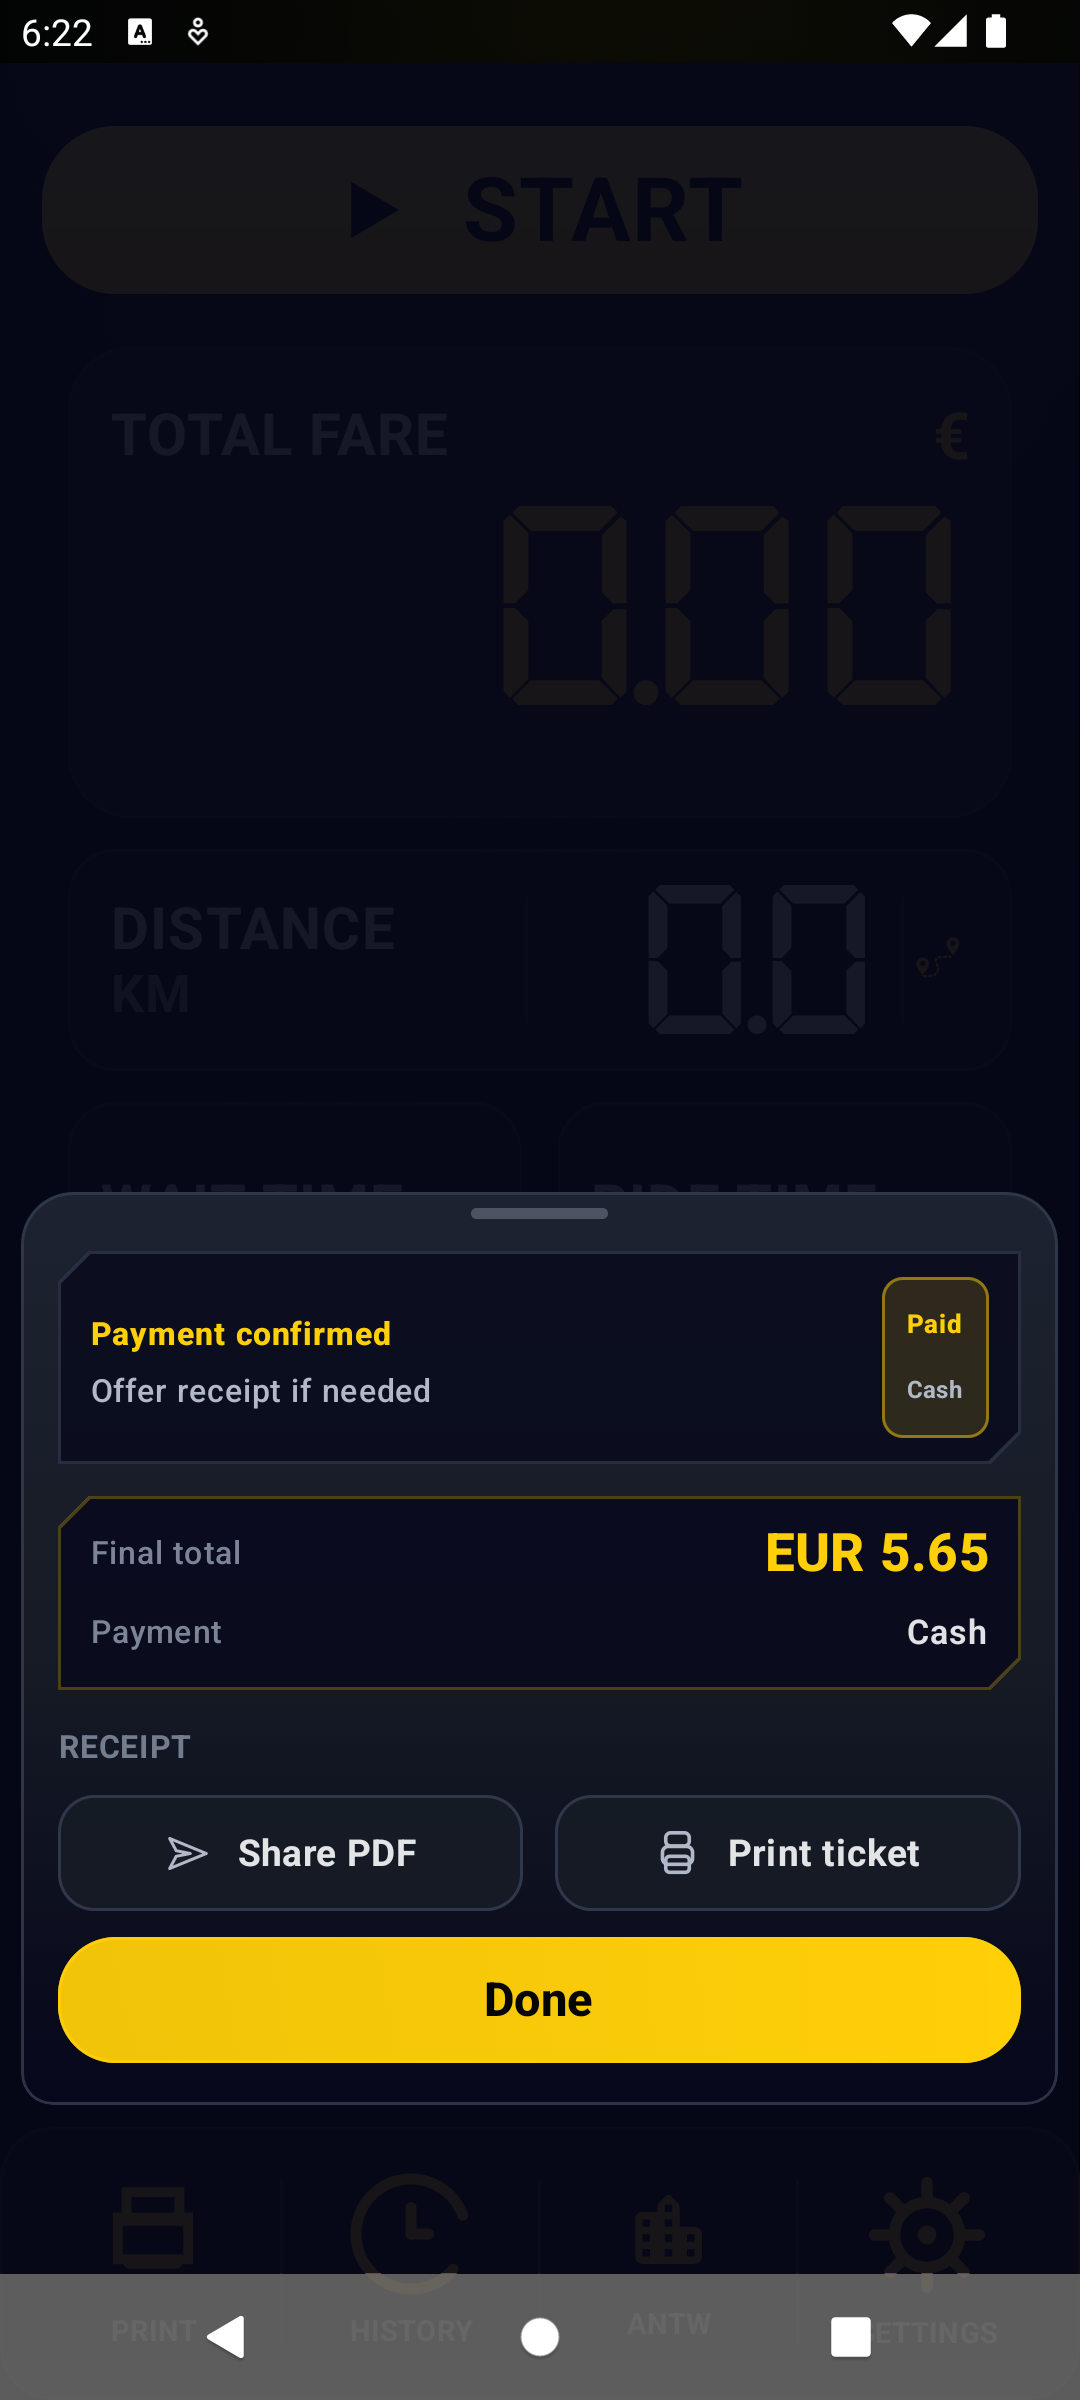
Receipt
Once payment is confirmed, the app keeps the final trip record available for receipt actions. Share a PDF or print a ticket when the passenger needs a record.
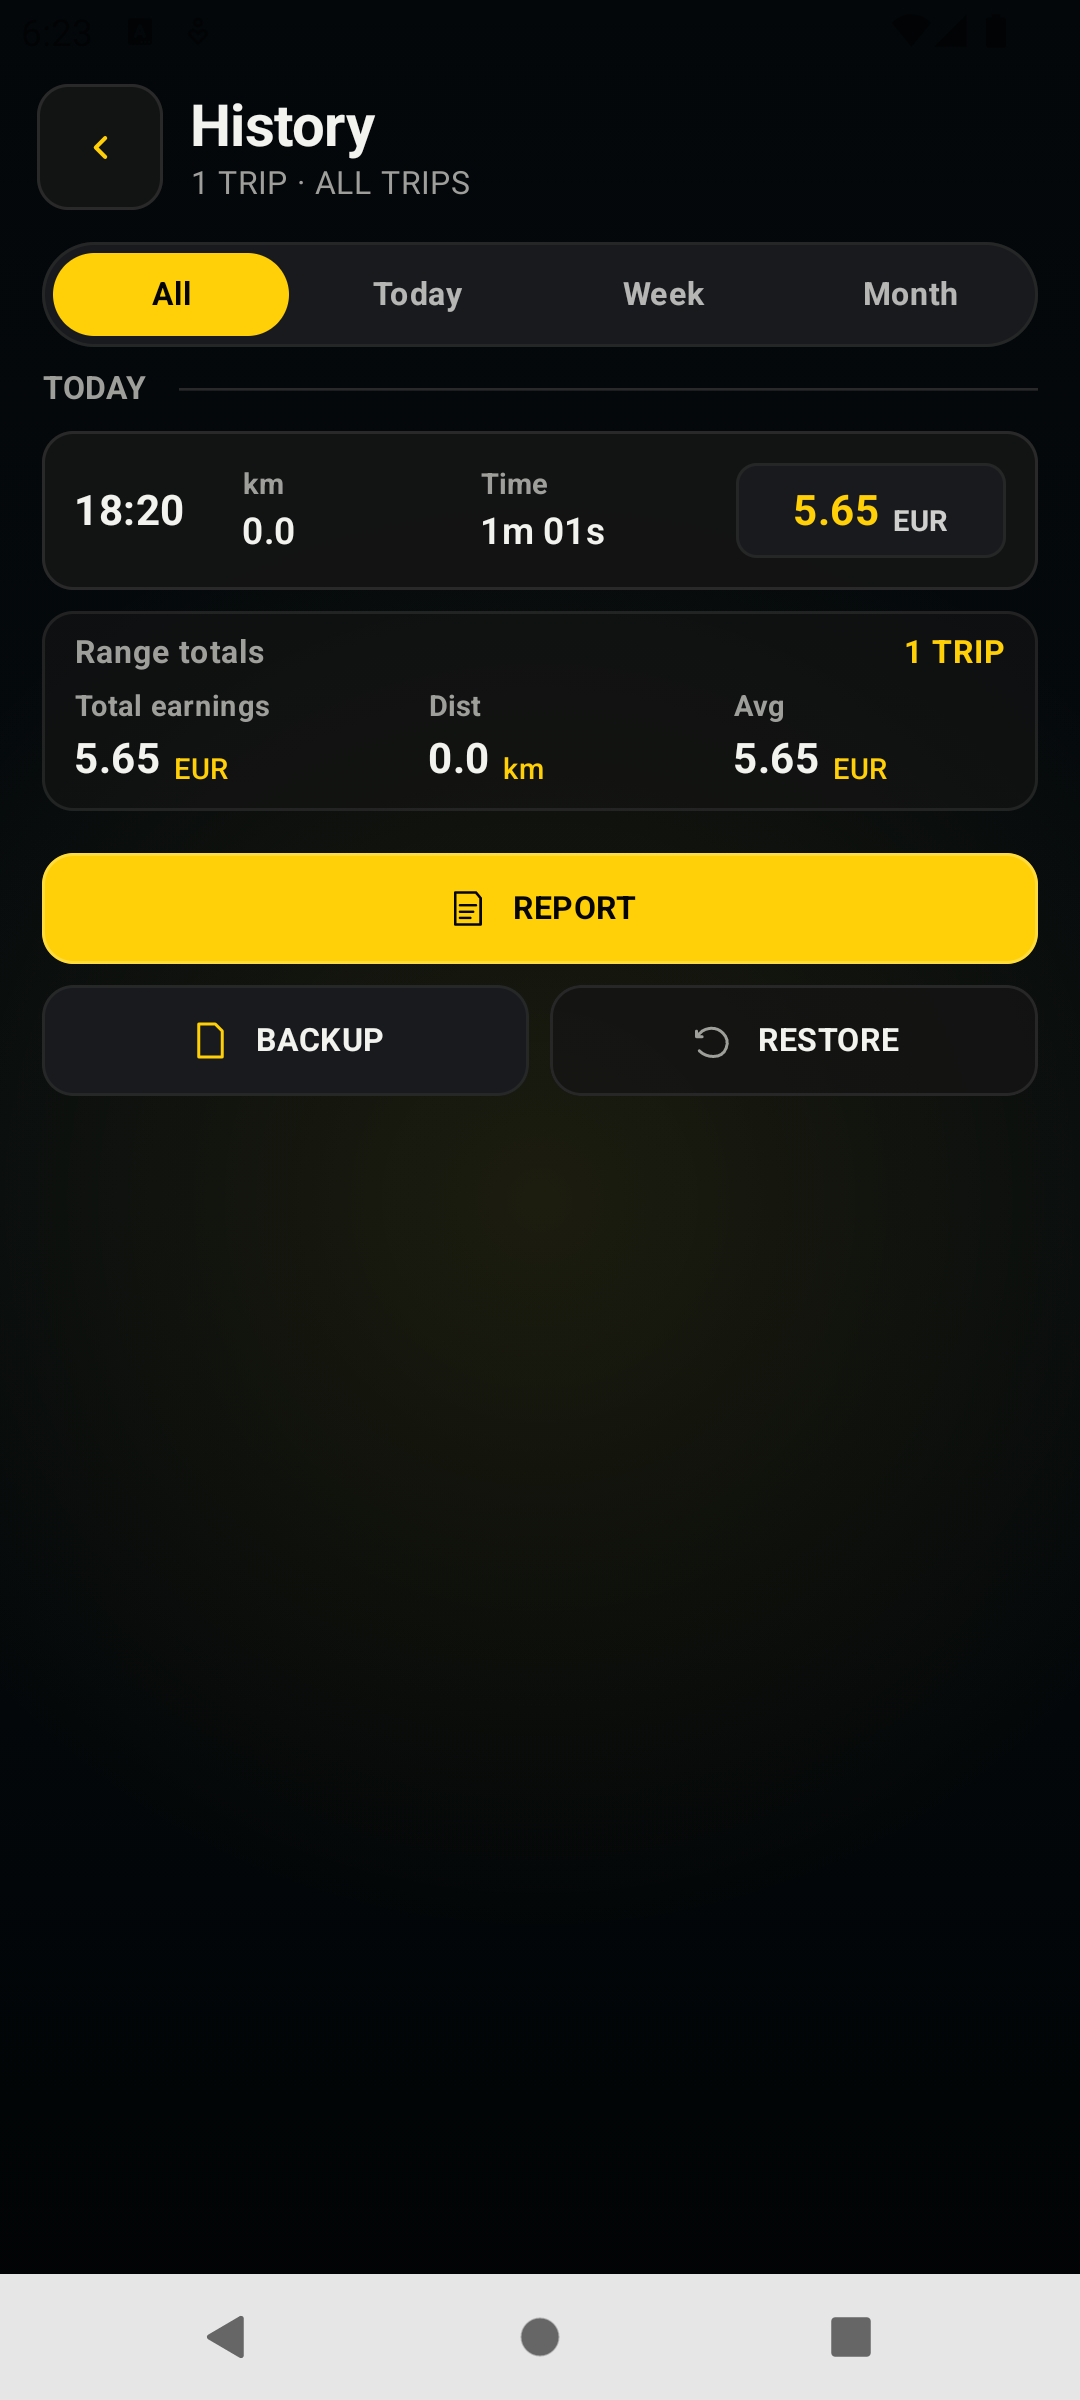
History
History stores completed trips on the phone. Use All, Today, Week, and Month filters, then create a report, backup trip data, or restore a readable JSON backup.
Settings
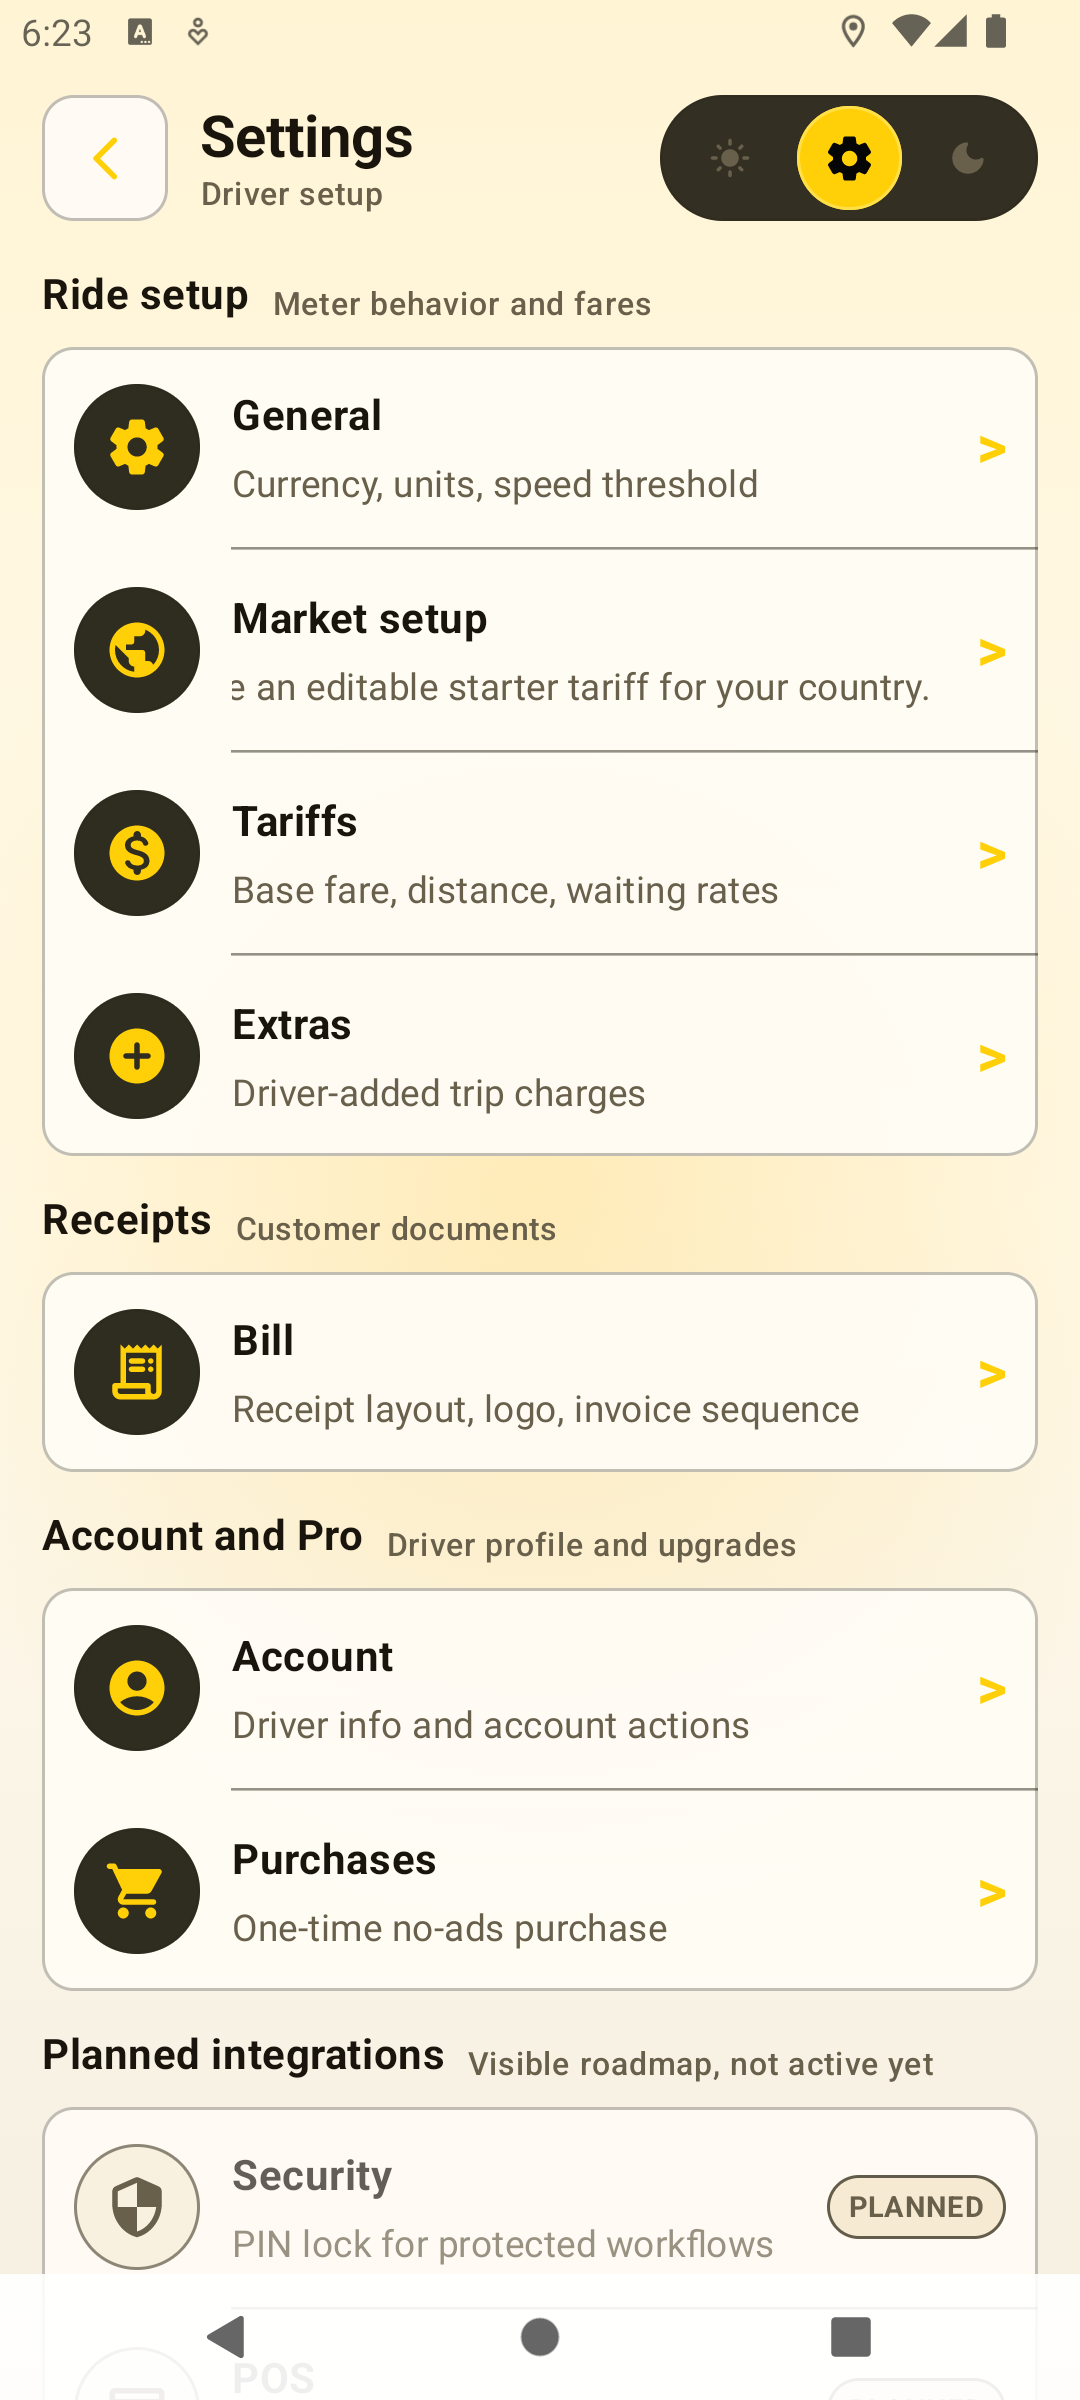
The Settings screen groups the app into Ride setup, Receipts, Account and Pro, and planned integrations. Security and POS are visible roadmap items, not active controls yet.
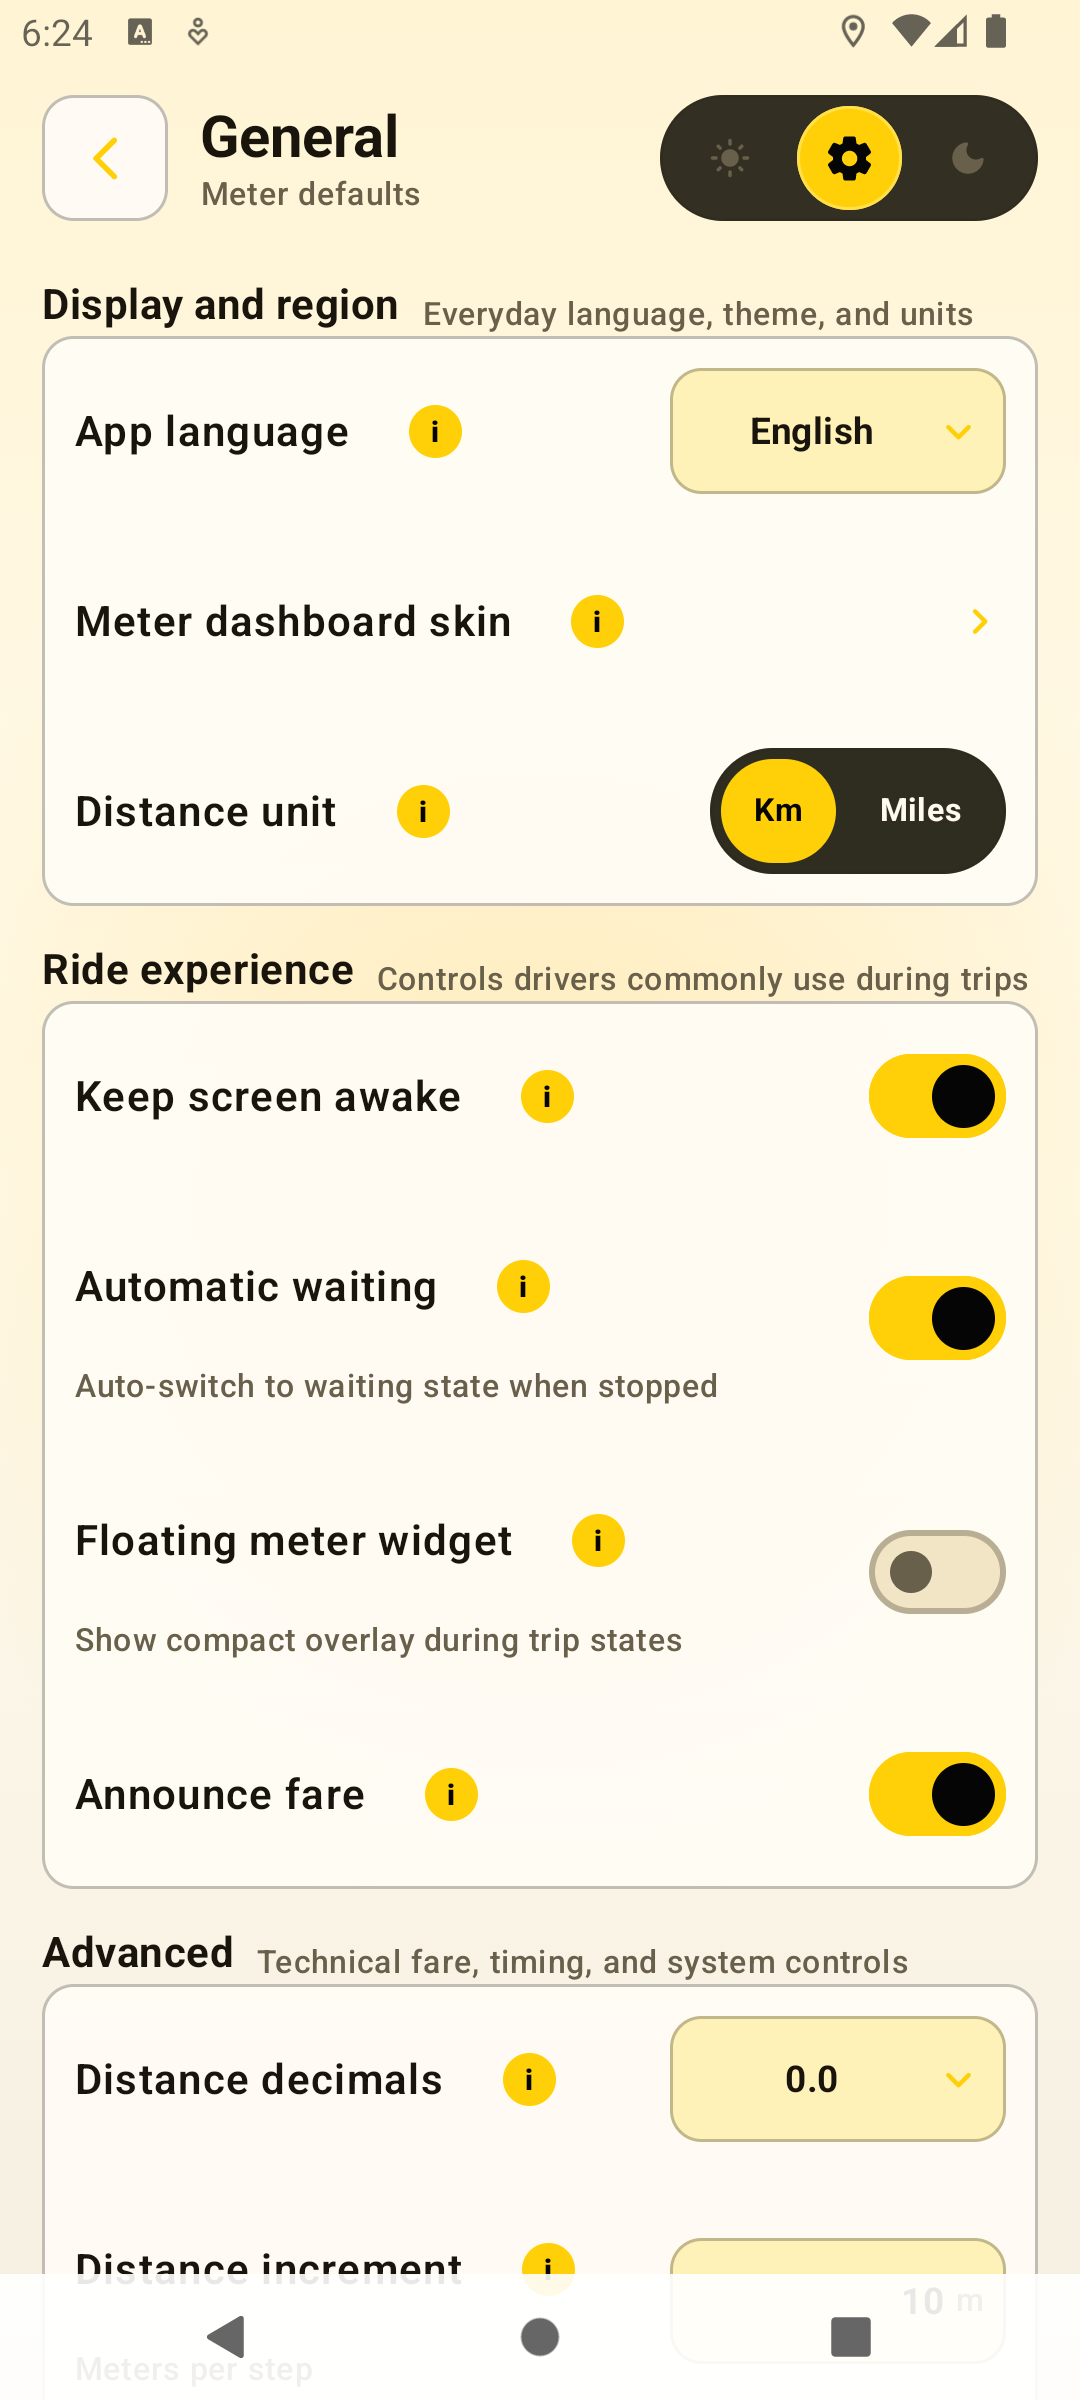
General controls everyday meter behavior: app language, dashboard skin entry, distance unit, screen awake mode, automatic waiting, floating widget, fare announcements, precision, rounding, tax direction, calculation mode, refresh rate, confirmations, and analytics.
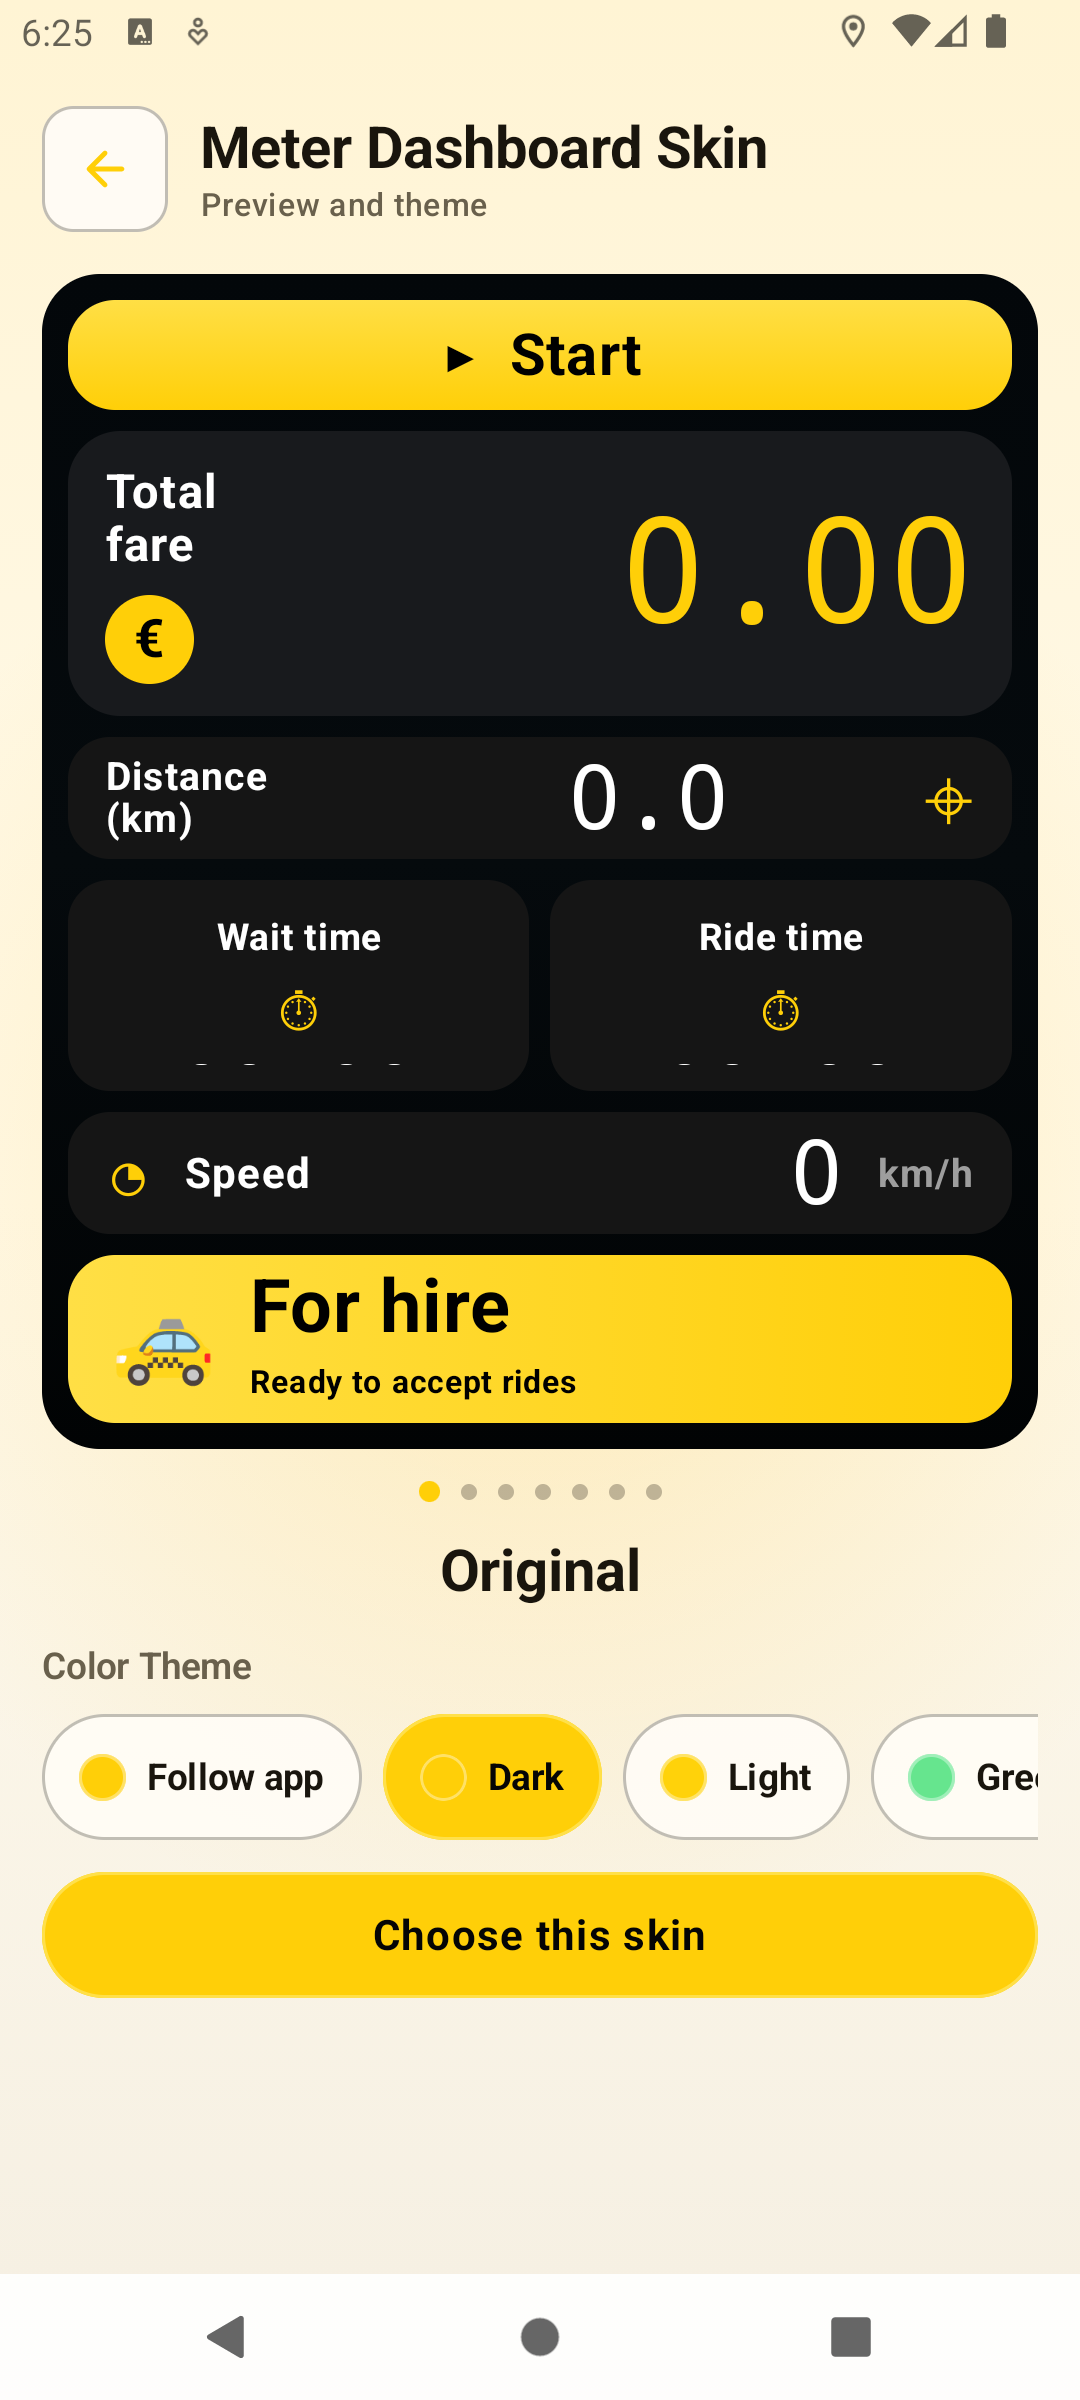
Choose the meter look and color theme. Original is the default, with additional selectable skins and locked preview skins visible from the carousel.
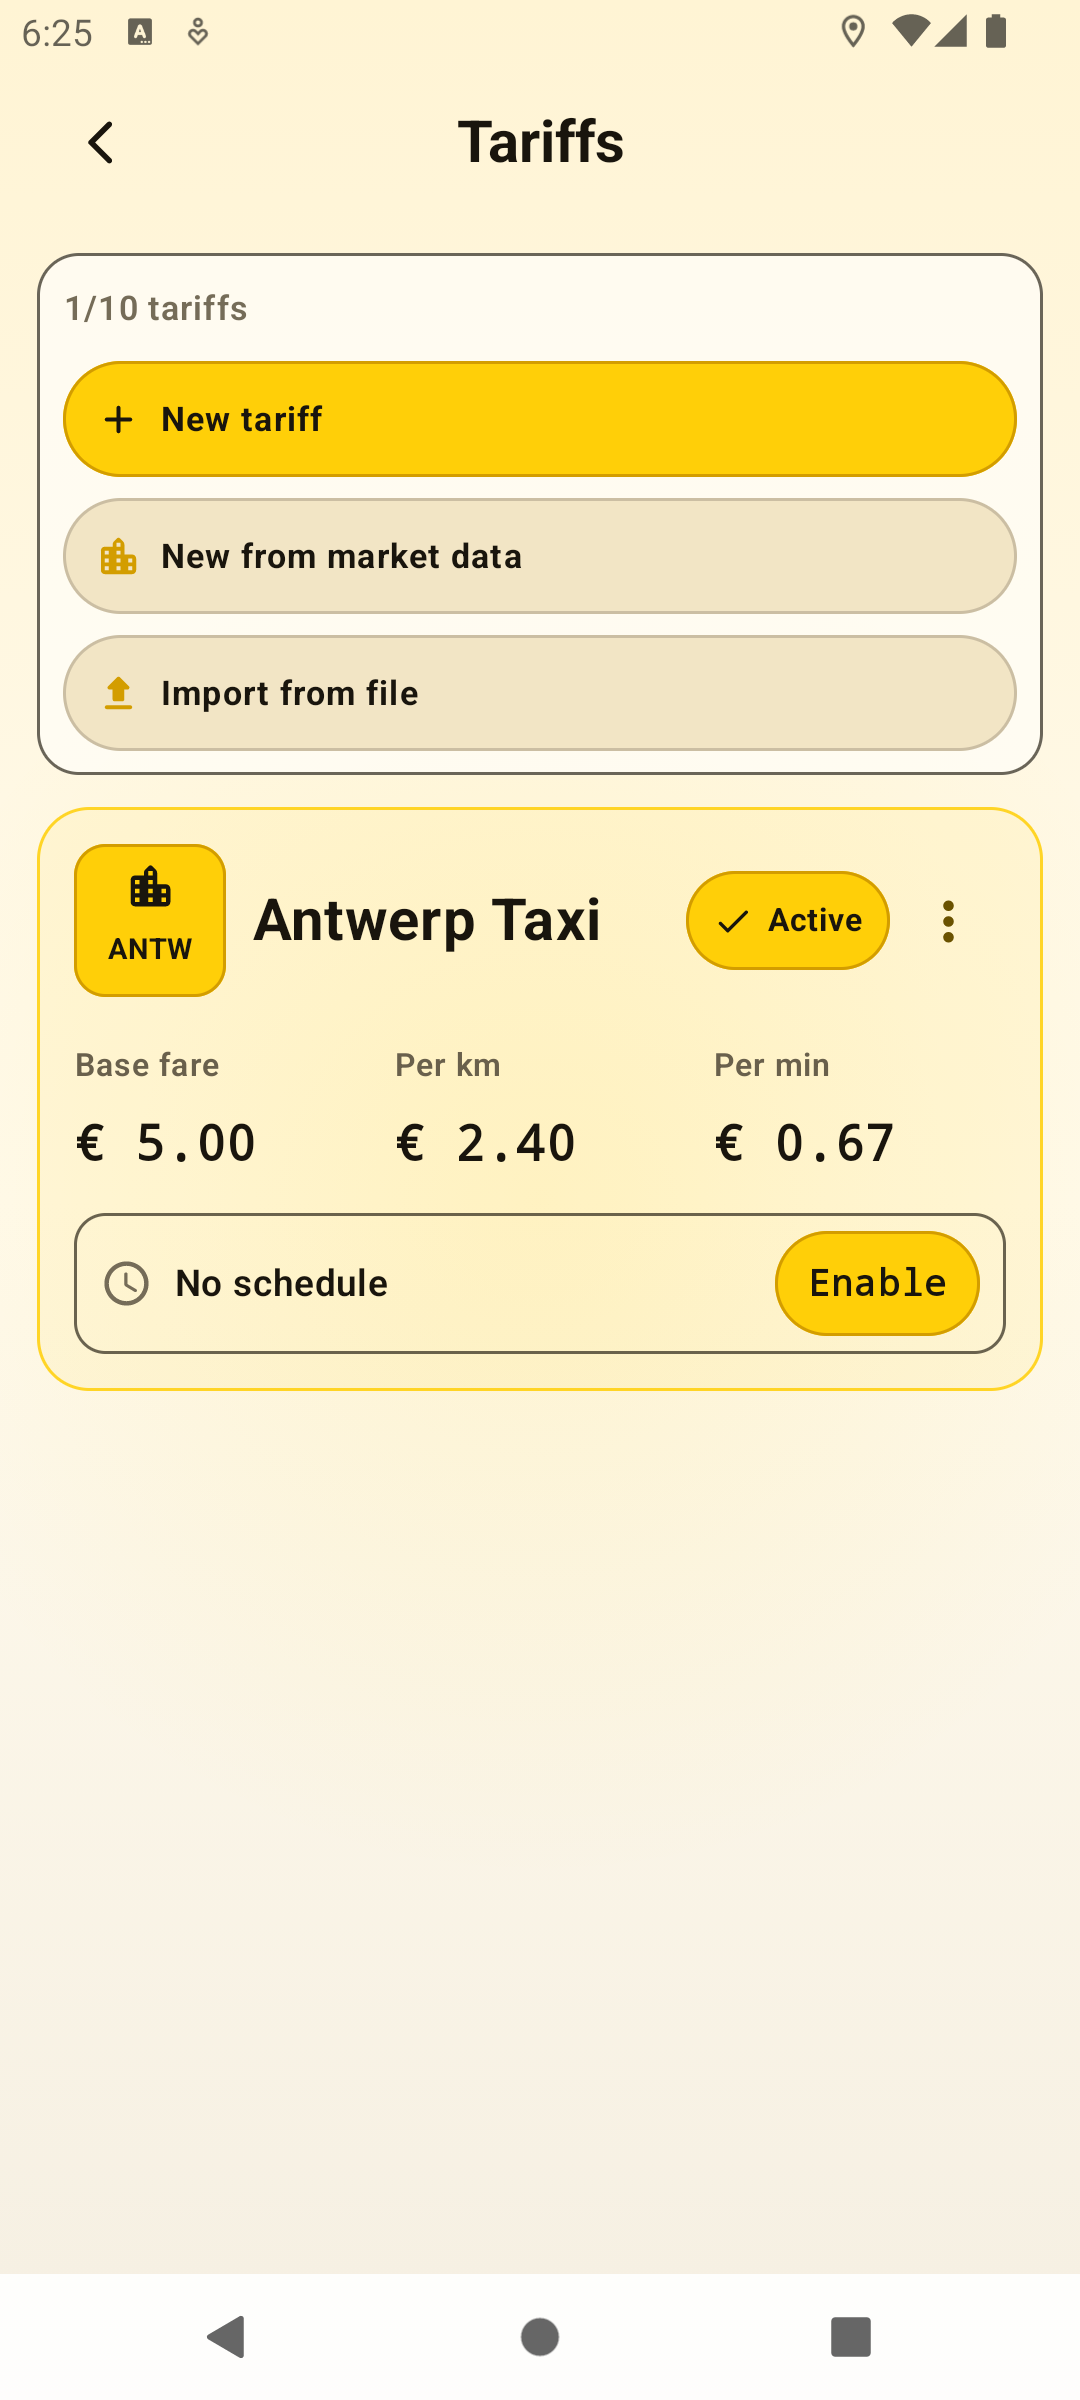
Tariffs manage fare profiles. Create a new tariff, create one from market data, import a file, edit rates, and choose which tariff is active while the meter is idle.
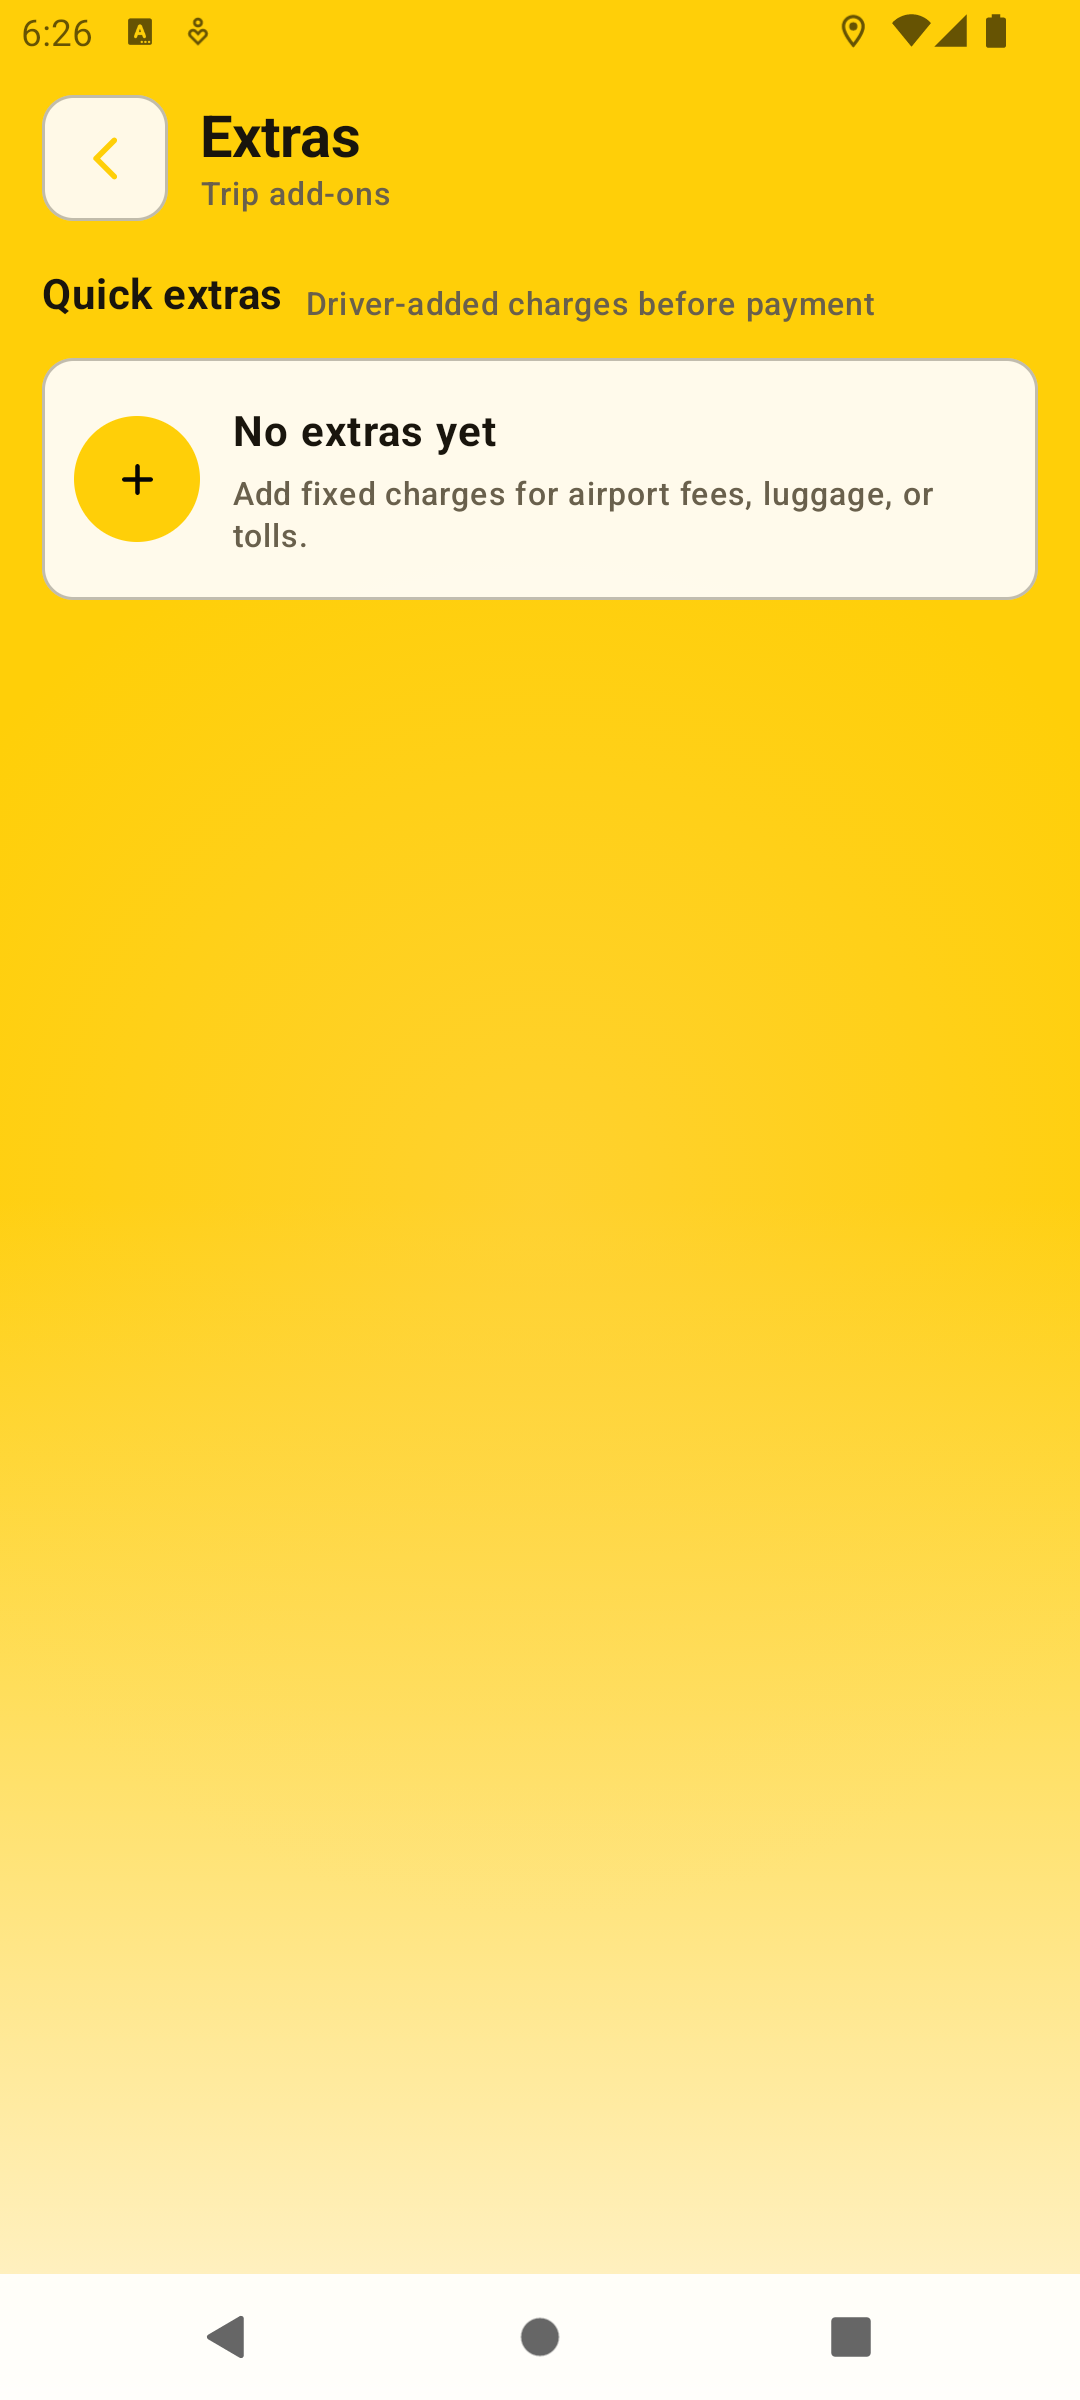
Extras are driver-added fixed charges such as airport fees, luggage, or tolls. Add them here, then select them during the end-of-ride payment flow.
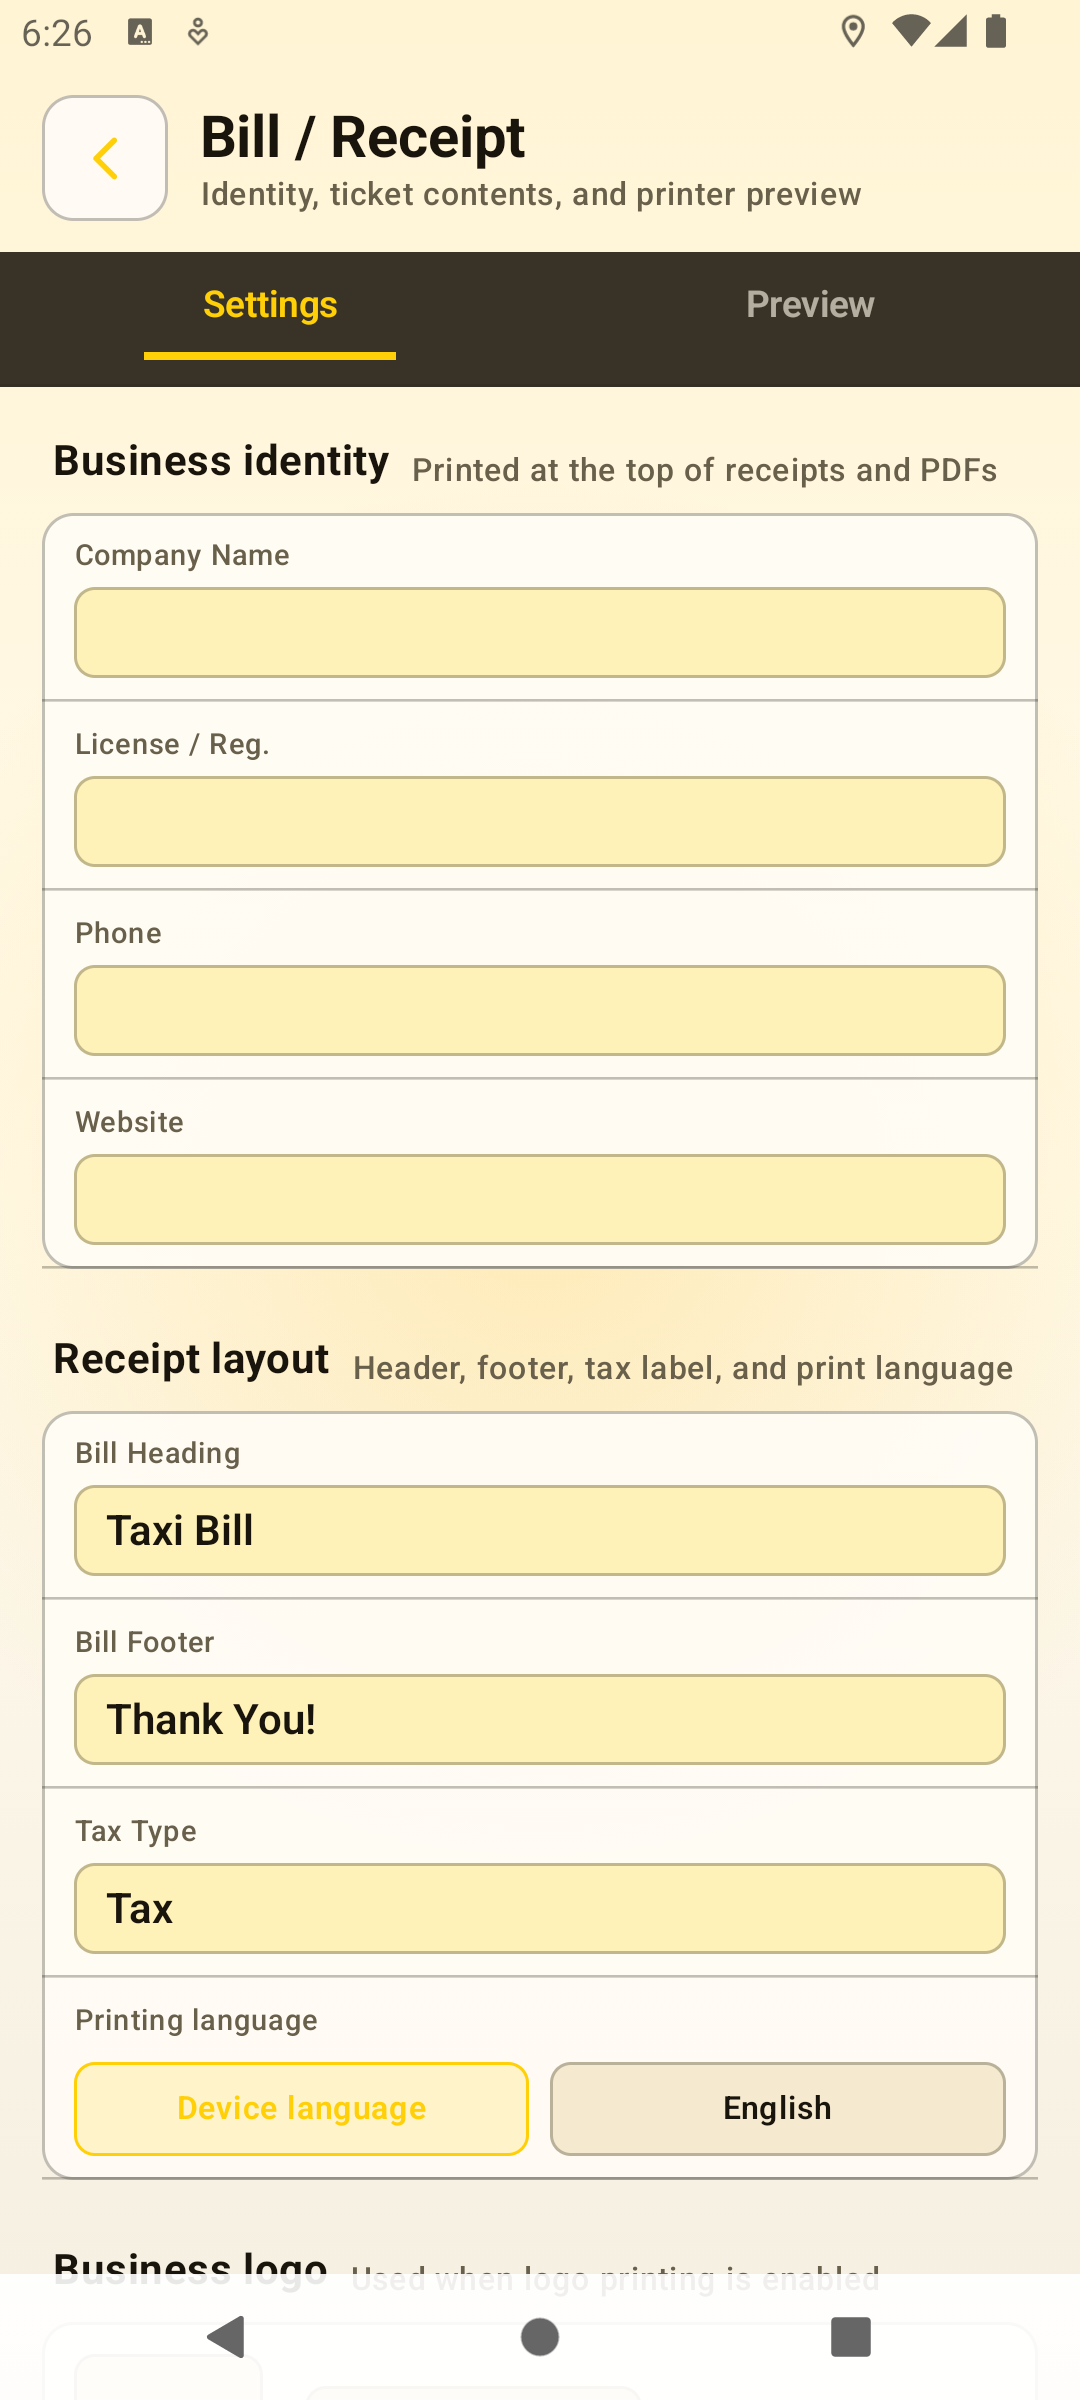
Bill settings control business identity, receipt labels, logo options, print language, invoice numbering, and a receipt preview before printing or sharing.
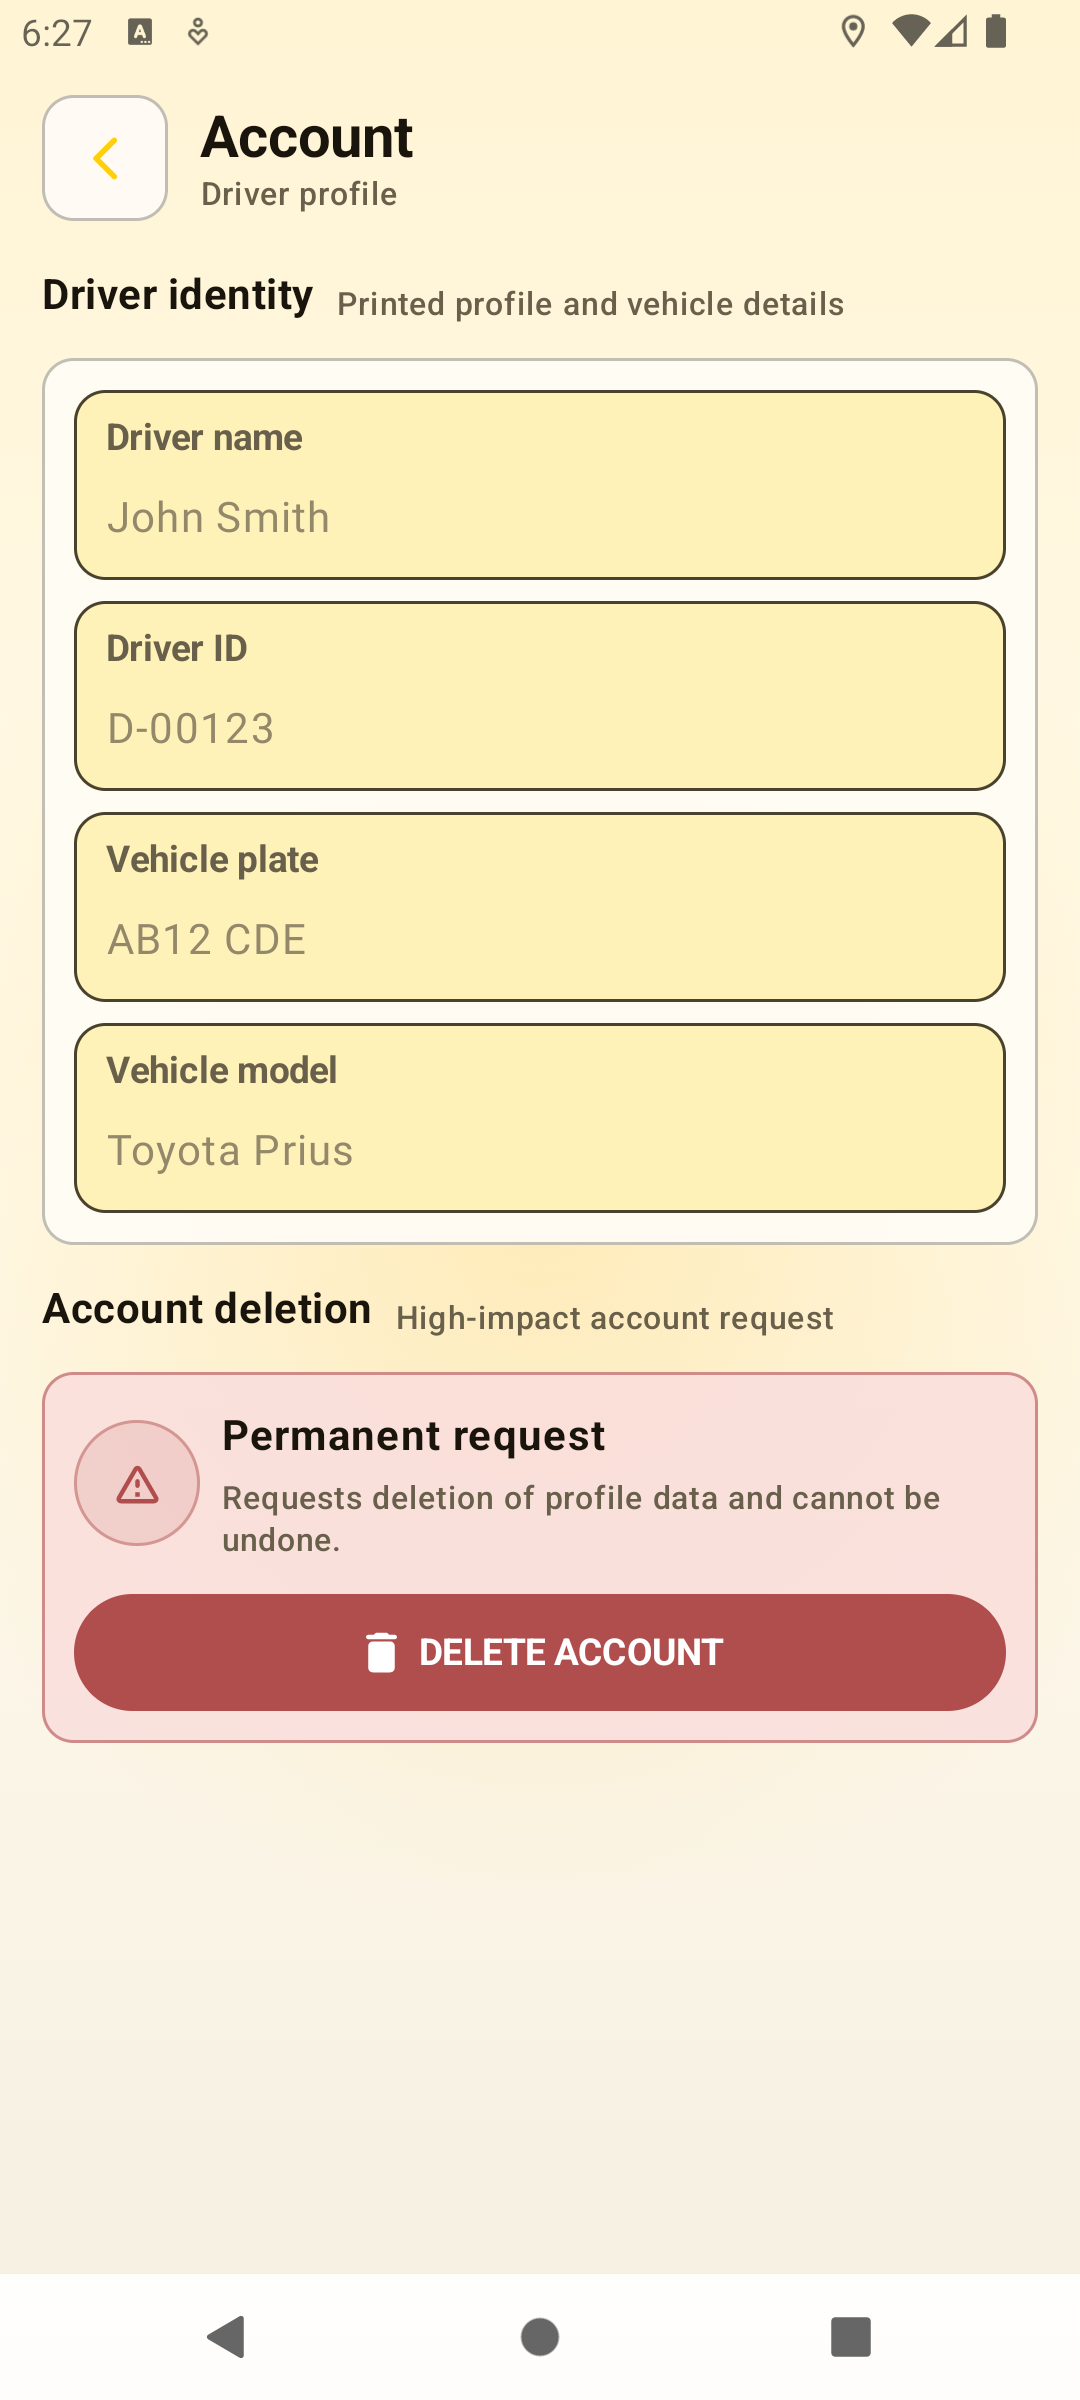
Account stores local driver and vehicle profile details used in app records. The account deletion action is shown separately because it is high impact.
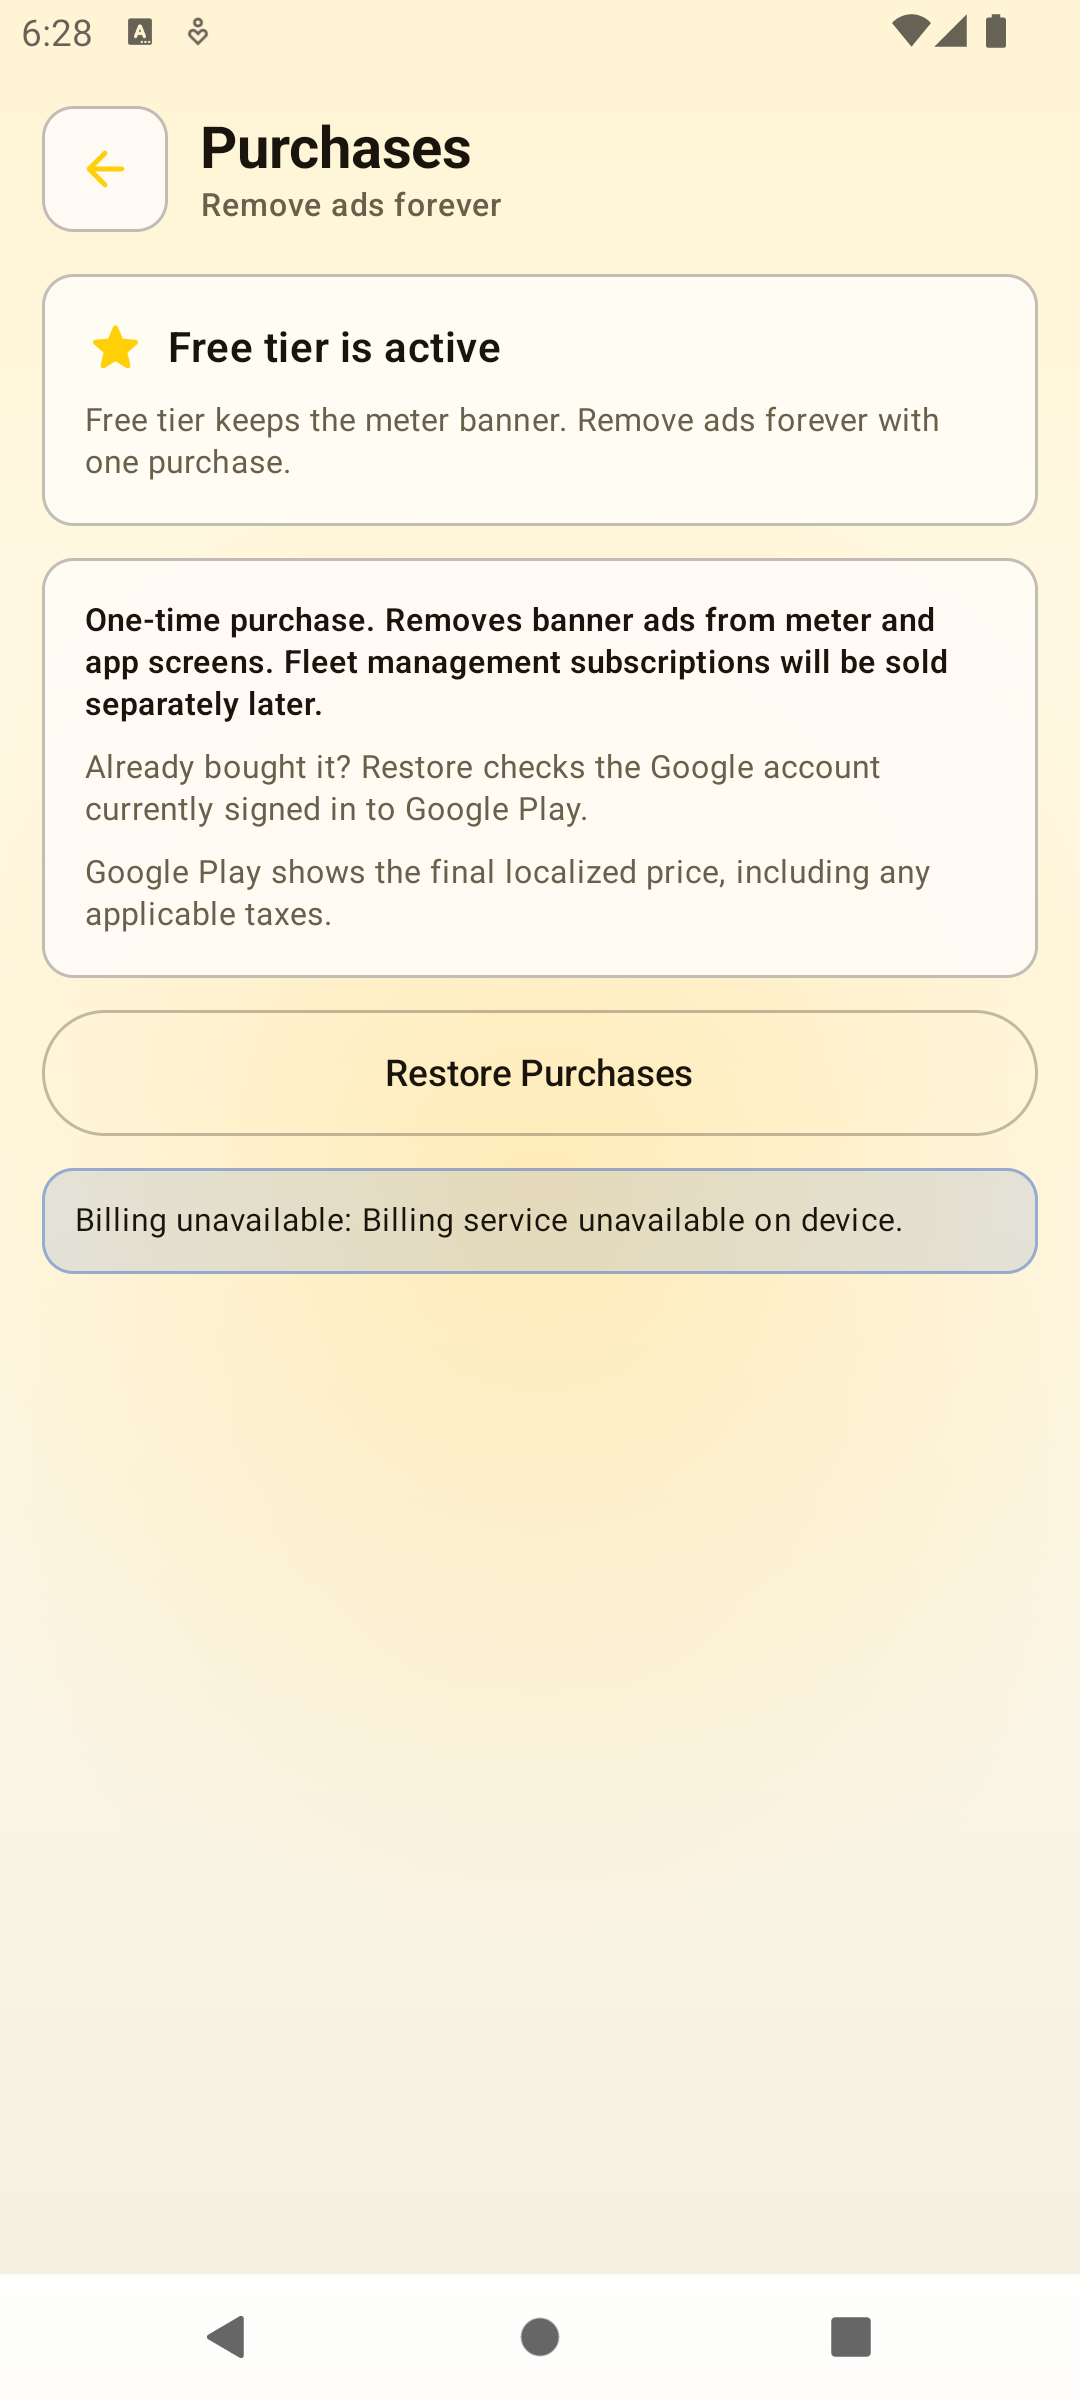
Purchases explains the one-time no-ads upgrade. Google Play shows the final localized price and handles purchase or restore for the active Play account.
Accuracy and local rules
Super Taxi Meter calculates fares from your Android device location and the tariff values you configure. GPS accuracy depends on the phone, signal, route conditions, and provider data.
Fare rules vary by country, city, and licence type. Use Super Taxi Meter where app-based meters are allowed, or as an operational fare and receipt tool when local rules require certified hardware.